• Skip to primary navigation
  • Skip to main content
  • Skip to primary sidebar
  • Home
  • About
  • Blog
  • Baking 101 Index
  • Contact

The Brownie Quest

Blog

7 Reasons Why Baking Failures Are Actually Helpful

October 7, 2020

Flat cakes that you could use as hockey pucks.

Accidentally putting in a tablespoon of baking soda instead of a teaspoon and having your cookies taste disgusting.

Having a recipe just not turn out to your liking, even though you did everything right.

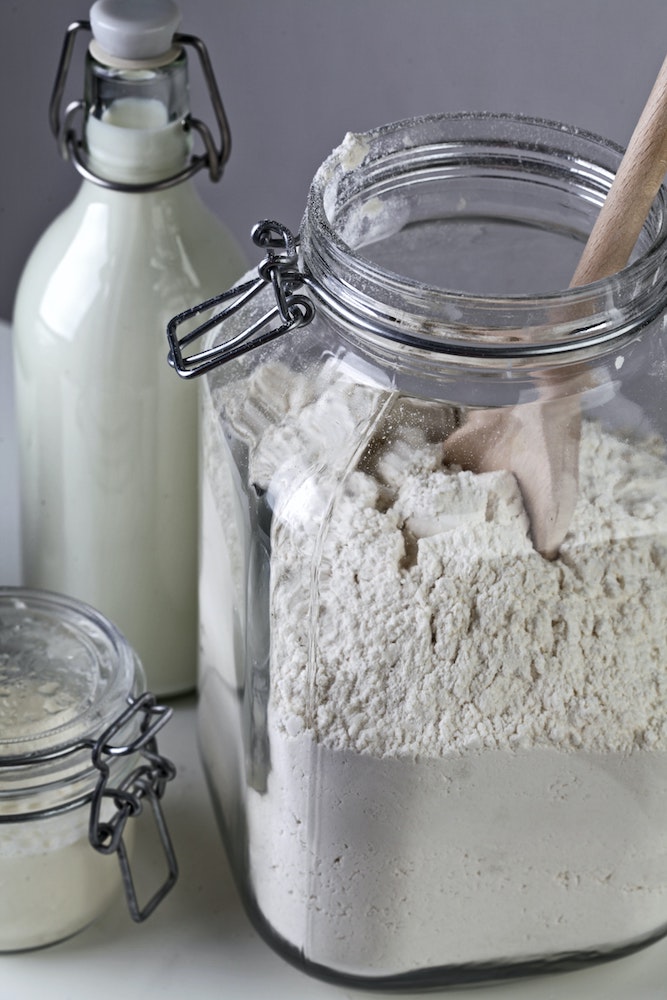
If you’ve been baking for any length of time, you’ll probably have experienced the pain of a baking failure. And it really sucks. No one wants to waste time and ingredients, especially if you were really looking forward to eating the thing you were making.

Gingerbread people; one is sad
How you feel when your bake doesn’t turn out

But instead of thinking that it’s reflecting badly on your own abilities, baking failures can actually be useful for you. (Yeah, I know this is a cliché thing to say it.)

It’s something I’m still learning myself. I’m bit of a perfectionist. I frickin’ hate spending an hour on a recipe and having it taste like crap.

It also feels really upsetting to have to throw something out. For one thing, I’m a vegan hippie who hates wasting food. But I also know it’s not worth it to eat something that doesn’t taste good.

So I thought I’d make a list for anyone like me, on why baking failures can actually help you.

  1. It can give you an idea of what you like in a baked good.
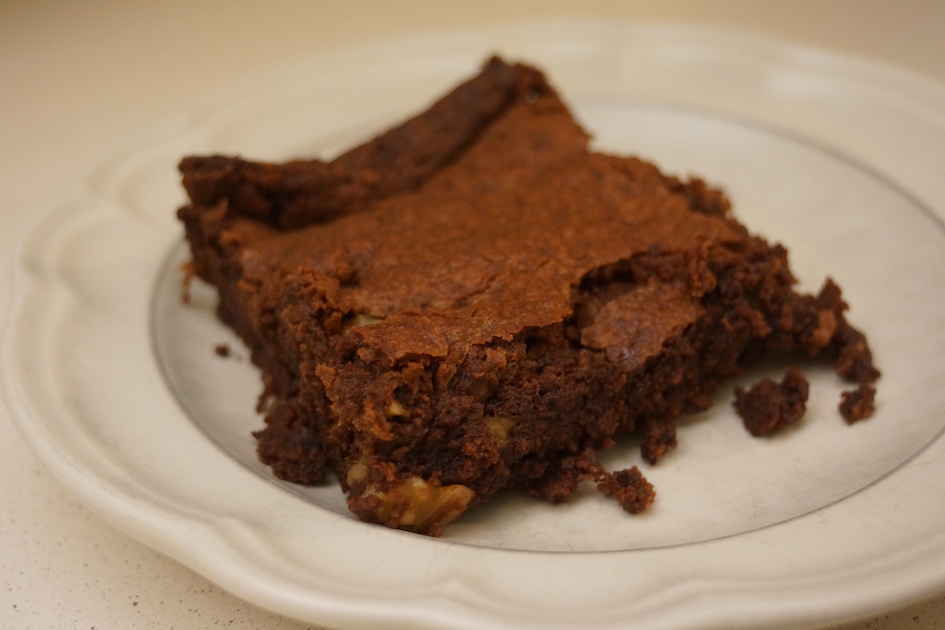
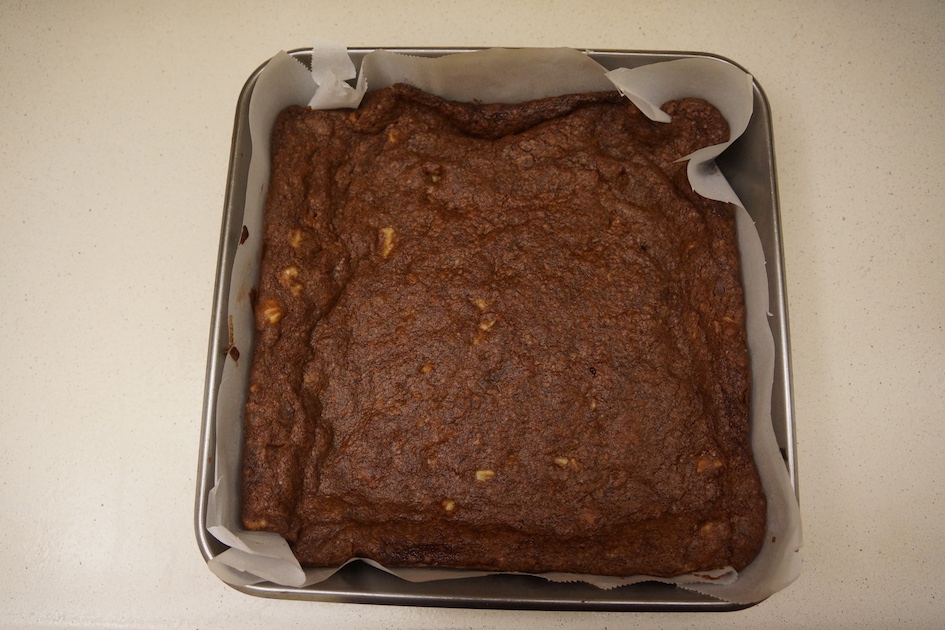
    A few weeks ago, I made a brownie that was ungodly sweet and had a terrible texture. Ugh. I had to throw it away because it was so gross. But that let me know that I should be looking for recipes that did not have two cups of sugar. The next week, I found one with ¾ cup of sugar, and it tasted a lot better!

    You’re not gonna enjoy every single recipe out there. So knowing what you do like, and what tastes good to you, is actually a super important step that naturally takes trial and error.

    When you do figure it out, you can spend more of your time on perfecting that great-but-not-quite-perfect recipe, and make something super amazing!
  1. You’re still practicing.
    All that time spent in the kitchen is still getting you somewhere.

    I offer you another cliché here: it takes ten thousand hours to become an expert at something, even when you’re failing along the way.

    Those super famous pastry chefs you see on tv? They didn’t get there without making a lot of mistakes along the way. Hell, they probably still make mistakes sometimes if they’re trying something new).
  1. It can give you something to work on next time. Maybe your loaf of sourdough tasted pretty good, but the texture was too dense. Why is that? How can you improve it when you make the recipe next time?

    Failures are the perfect opportunity to learn more about the science of baking (I say, as a baking science enthusiast).

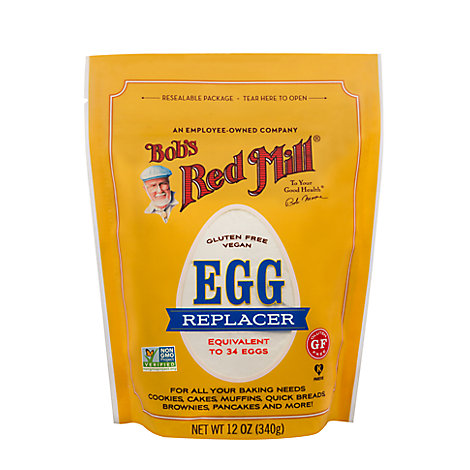
    Could those strangely-textured cupcakes be improved by using a different egg substitute next time?

    Are you kneading your bread too much or too little – and why does that even matter?

    With Google as your friend, do some research on your problem. Chances are, someone’s had the same problem as you and can explain it. This will help you the next time you make the recipe. Or it can lead you to an even better recipe that helps you understand the process better.
  1. If you’re inventing the recipe yourself, a failure can help you understand what to improve. 
    As a kid, I went to an event with my parents, and we had the most magnificent lemon-white chocolate bread. It wasn’t a sweet loaf bread, but it had more of a base of a French bread.

    I’ve experimented with recreating this bread several times. While none of my attempts were terrible, they weren’t great either.

    The first attempt, all of the lemon peel and white chocolate congealed in the center, creating an oddly-filled loaf. Tasty, but I wanted the fillings to be more scattered.

    On the second attempt, the ingredients were more scattered, but there wasn’t enough of them. The white chocolate also burned where it was exposed to the heat. The first loaf actually tasted better.

    These attempts weren’t perfect by a long shot, but they helped me understand better about what I was attempting to do in the first place. 

    Just like when people always asked me what I wanted to be when I grew up, and I would always say, “I don’t know, but I know I don’t want to be a doctor!”, it’s helpful to understand what works and what doesn’t with your recipe. Otherwise, there’s nothing to learn from and improve.
  1. It can help with perfectionism. 
    I said it before in this post, but I have a huge perfectionist streak. I will actually procrastinate on doing something to avoid failure entirely.

That’s because it’s always super frustrating to spend an hour – or even half the day – working at a recipe, only for it to turn out mediocre, or even worse, inedible! 

It happens to even the best bakers, though. Just watch The Great British Bakeoff. They’re all amazing bakers, but sometimes, even they have bad days where their cakes don’t rise or they use salt instead of sugar.

Making mistakes can humanize the process of baking and let you know that your worth isn’t tied to your work. Your family’s still gonna love you, even when you serve them questionable baked goods (thanks, Mom and Dad).

  1. It helps improve your patience and mindfulness.
    In relation to my perfectionism, another thing I struggle with is not being good enough right this instant. I just wish I could just have GoodBaker 7.0 software installed into me so I could make fancy baked goods like a pro.

    But learning new things, one recipe at a time, helps you become a more patient person. Baking is as much about the learning process as it is being able to make a perfect three-tiered cake.

    I also think that baking encourages mindfulness. Getting your hands covered in flour, putting your muscles into rolling out dough makes you feel connected with your body and the real world. It’s a great stress reliever, and it can get you out of your head.
  1. It helps you be okay with baked goods that are “just okay.”
    Baking mediocrity can feel like a failure within itself. You know, that loaf of bread that your family eats but doesn’t rave about. That cake that’s perfectly edible but not something you really want to make again.

    You don’t always have to make the greatest thing ever to still be a successful baker – or a successful person. You’re you, and you’re trying and learning every time you try a new recipe.

Baking failures totally suck, but that doesn’t mean that you suck.

Now go on and bake something awesome.

Filed Under: Baking 101, Blog Tagged With: baking 101, baking failures, vegan baking

Baking 101: Self-Rising vs. All-Purpose Flour

September 25, 2020

When you’re baking, it’s super important to keep an eye out for unfamiliar ingredients, even if you think they sound familiar.

For me, it happened when I was baking lemon cupcakes. I thought it was weird that there was no baking powder or baking soda in the recipe, but it should be fine, right? “Self-rising flour” still has flour in its name, so it’s basically the same thing, right?

Wrong.

My cupcakes ended up very dense and flat, because self-rising flour is not the same as regular flour!

But it inspired me to write this post, so that you won’t make the same mistake.

So what is the difference between self-rising flour and all-purpose flour?

All-purpose flour is just your standard flour. It’s just plain ground-up wheat.

Self-rising flour has an added leavening agent in it so you don’t have to add it yourself. It’s commonly used in baked goods, like cakes, biscuits, and breads.

Grocery stores sell self-rising flour, but having added ingredients mixed in means that it can go bad sooner than regular flour.

So it’s just as easy to know how to make it yourself, especially if most of the recipes you use call for all-purpose flour! Don’t worry; it’s super simple to make it yourself.

Flour in a glass jar
Print

Self-Rising Flour

A super-easy fix for when your recipe calls for self-rising flour, but you only have all-purpose!
Course: Baking
Keyword: Baking Science, Recipe
Yield: 1 cup

Materials

  • 120 g (or 1 cup) all-purpose flour
  • 1 ½ tsp baking powder
  • ¼ tsp salt

Instructions

  • Whisk together flour, baking powder, and salt thoroughly in a small bowl.
  • Use wherever a recipe indicates you should use self-rising flour!

What happens if you just use all-purpose flour when the recipe calls for self-rising flour?

It’s likely that if your recipe uses self-rising flour, it doesn’t have another leavening agent as an ingredient. Therefore, your cake won’t rise and will be a gummy, flat mess, just like my poor lemon cupcakes. 🙁

What happens if you use self-rising flour when the recipe calls for all-purpose flour?

Chances are, if you’re baking something like a cake and your recipe wants you to use all-purposes flour, it will also have a leavening agent as an ingredient. Whether that’s baking soda or baking powder, the recipe will have something to make your bake rise. 

When baking powder or soda is activated, it creates little bubbles, and this gives a rise to your cakes and breads. But too much can cause your baked goods to rise way too quickly in the oven and then collapse. You’ll end up with a flat cake!

Too much soda or powder can also give your baked goods a funky, bitter, almost metallic taste. It’s not very pleasant, especially if you have something with a delicate flavor, like vanilla.

Basically, the right amount of leavening agent in your baked goods is super important. Therefore, pay attention to whether your recipe is using all-purpose or self-rising flour! Most recipes I’ve used do use all-purpose, so it’s probably not something you’ll come across that often.

Filed Under: Baking 101, Blog, Science Tagged With: baking 101, baking science, flour, vegan baking

Vegan Baking 101: Vegan Egg Substitutes

September 24, 2020

Eggs. They’re one of those ingredients in traditional baking that’s hard to replace. Butter is easy. They’ve had margarine for years, and now they have specifically vegan butter. Same with milk. You’ve got a dozen different types of plant milk to choose from.

But eggs are trickier. They’ve got a lot of different functions in baked goods, and there’s no one perfect substitute.

So I’ve compiled a list of some of the good ingredients that are great vegan egg replacers.

These work best when you’re just replacing an egg or two in a recipe like cookies or muffins. For some other recipes that rely more heavily on eggs (such as quiches, meringues, and genoise cake), you are better off looking for a vegan-friendly version.

Pre-packaged egg replacer

You may be asking, “They’ve literally got products out there that are marketed as vegan egg replacers, so shouldn’t I be using those?”

You definitely can! They work well for baked goods like cake and cookies. But sometimes you run out. Or maybe, you’d rather use a straightforward ingredient rather than a prepackaged powder (especially if you have allergies). Or you already buy, say, ground flax seed for other purposes, and it’s just more straightforward to use it in place of eggs too.

So back to the egg replacer. What is it, and how does it replace eggs?

A package of Bob's Red Mill Egg Replacer

To figure out what exactly a powdered vegan egg replacer does, let’s look at my package of Bob’s Red Mill egg replacer. I’m using this since Bob’s Red Mill does a great job of making simple products without a ton of additives.

So their product is made up of potato starch, tapioca flour, baking soda, and psyllium husk fiber. Let’s go through these ingredients to figure out the functions – and why it works to replace eggs!

Fallon’s Science Corner

Potato starch is made from potatoes (obviously), which are a naturally starchy food. Potato starch can help bind and thicken your baked goods, sauces, soups, and other stuff you’re cooking.

Tapioca flour has basically the same function. Tapioca flour is a smooth powder made from the roots of the cassava plant. It makes a particularly good substitute for cornstarch, especially if you’re allergic to corn.

The biggest difference between tapioca flour and potato starch is that the latter is a little denser. I imagine that they used both ingredients in this egg replacer to get the optimal, most egg-like density.

You probably know what baking soda is, but it’s a leavening agent. That means it’ll help your baked goods rise and stay fluffy. Eggs do add texture and rise to baked goods, especially if you beat air into them. So baking soda is included here to mimic this rise.

Lastly, psyllium husk fiber comes from pulverized psyllium husk shells. It contains a lot of dietary fiber. Alone, it can be used with other ingredients to replace flour in gluten-free or keto baking. It can also help you with constipation. Fun! 

In smaller quantities, like in this egg-replacer, it has a different function. When added to water, it turns gel-like – kinda like the texture of an egg! This is the binding agent of your egg replacer, the stuff that holds your baked goods together and improves the crumb structure.

Of course, this is just one brand of egg replacer. Other brands have different ingredients, but the function stays the same. It mostly acts to bind, thicken, and give a little rise to your baked goods. 

Packaged egg replacer isn’t a magic replacement for eggs though. You can’t just chuck it in place of any recipe that calls for eggs; please don’t try and make an egg-replacer omelette!

What are my other options for replacing eggs?

Glad you asked! Here are some of my favorites.

Ground Flax Meal

Shelf of dry goods in glass jars

1 tablespoon of flax meal + 3 tablespoons of water = 1 egg (just let it sit for a few minutes until it gets all gooey).

Make sure you’re using the ground up stuff, not the full flax seeds. The seeds don’t get all gooey like the flax meal does. You can grind up the seeds yourself and enjoy the terrible noise it makes, or you can buy pre-ground flax meal for fairly cheap. Just stick it in your freezer, and it lasts longer.

Chia Seeds/Chia Powder

1 tablespoon of chia seeds (or ground chia powder) + 3 tablespoons of water = 1 egg (just let it sit for a few minutes until it gets all gooey)

Unlike flax, chia doesn’t need to be ground up first.

I prefer using flax meal for most recipes, as it doesn’t have a distinct texture when mixed into doughs and batters. Chia seeds do add a poppy seed-like texture to your baked goods. But if you don’t mind that (or if you’re looking for an egg substitute for your poppy seed muffins!), it works really well! 

Be warned that chia goes frickin’ everywhere and sticks to everything if it gets wet. It’s like glitter. You’ll be finding it in unexpected places around your kitchen for days later.

Fruit or Vegetable Puree

Pile of squashes

I would say that fruit puree is a great way to add some more nutrition to your baked goods, but who am I kidding? Cake isn’t healthy, even if it’s vegan and has a bit of sweet potato in it. If it’s super healthy, then it’s a frickin’ fruit salad.

Fruit puree definitely works better for some recipes than others. For one thing, some of the options below can impart flavors and colors – probably not the best option if you want a delicate vanilla flavor. But if you’re making a recipe with a bold chocolate or coffee flavor, the flavor of your fruit puree can be masked.

Puree also adds extra moisture and sweetness to your baked goods. This can work really well if you only need to substitute one egg. 

Here are some options:

Applesauce – this is the most versatile, as it’s least likely to add additional flavor. One of my favorite carrot cake recipes uses quite a bit of applesauce.

Banana – adds banana flavor, especially if you use a lot of it. Works well if the thing you’re making would work well with a banana accent.

Sweet potato – will add orange color

Avocado – a decidedly more expensive option, and it can add a certain flavor if you’re making a lighter-flavored baked good. I haven’t used this much.

Squash, such as pumpkin or butternut – similar to sweet potato, squash can add an orange color to your bakes, and it might give it a funky flavor if you’re making, say, a vanilla-flavored bake.

Aquafaba

That stuff that you dump out when you open a can of chickpeas? Turns out that it’s really useful. The vegan community only found out about aquafaba’s egg-replacing powers in late 2014 into 2015. From there, it’s exploded. There’s even cookbooks centered around everything you can do with this stuff.

Chickpeas on orange background

Aquafaba is best used for recipes where you need to whip air into eggs, such as meringues. I would suggest finding a specific vegan recipe if you want to try this out; it’s taken bakers a bit of experimenting to get this right, and it’s not something you can exchange for eggs one-for-one.

Also, if you’re worried about the chickpea taste, know that it doesn’t taste like chickpeas once you add other ingredients to it. Just make sure to get unsalted chickpeas at the store.

Tofu

Like fruit puree, tofu can mimic the moisture of eggs. Silken tofu is probably the most common type you’ll see in sweet recipes, as it’s got a creamy mouthfeel. Tofu isn’t the most common egg replacer out there; it’s more frequently used as a main component in recipes such as creamy pies and tarts.

Outside of baking, if you’re trying to make a savory scramble for breakfast though, use firm tofu. It works great, and you can even mimic the eggy taste and color with spices and a certain type of salt.

There you have it, a bunch of easy ways to replace eggs in your baked goods! There’s probably even more substitutes out there, but these are all easily accessible options, and ones that I’ve used before.

What are your favorite ways to replace eggs when you’re baking?

Filed Under: Baking 101, Blog, Science Tagged With: baking 101, baking science, egg replacement, eggs, vegan baking

The Brownie Quest: Attempts 1 and 2

September 23, 2020

Hello, I am a professional dumbass.

Why? Well, I wanted to make two different recipes of vegan brownies in one day. But obviously, two whole pans of brownies are too much, so I halved the recipes in my head.

And then I forgot halfway through.

So basically, these brownies were sorta halved. They’ve both got too much egg replacement and sugar in them. I tried to fix them, but there’s only so much you can do when you have your batter already made, and like I said, you really don’t want two whole trays of brownies.

In any case, they both ended up being pretty tasty, and they gave me a good starting point to know where I should improve.

The Original Recipes

Going into this, I thought back to what my “perfect brownie” was.

I figured that because my childhood dream brownie (like a Barbie dream house, but tastier) was from a Ghirardelli box mix, their recipes should get me somewhere in the vicinity of what I wanted.

To my delight, the Ghirardelli website had a number of (non-vegan) brownie recipes to give me a good start. I chose the “Fudgy Chocolate Brownies” and the “Classic Chocolate Brownies,” as they seemed like similar recipes with a few key differences (namely, the second recipe added in butter and baking powder, plus brown sugar instead of regular sugar).

Of course, I added chocolate chips and nuts to them, since that’s a requirement of mine. I also veganized them (obviously).

But let’s see how they stacked up.

Recipe 1

Square piece of brownie on a place

Recipe 1 was based off of the “Fudgy Chocolate Brownies” recipe.

I was pleasantly surprised at how simple the recipe was, just six ingredients (eight, when I added the chocolate chips). I made another recipe earlier this month that had twelve ingredients, so it was nice to make something a lot simpler.

My test subjects (by that, I mean my parents) liked Recipe 1 better. They thought it was closer to the “perfect” brownie. I agree; it was a denser, fudgier texture, especially after the brownies had been sitting around for a few days.

Surprisingly, despite the fact it had twice as much sugar as it was supposed to, I didn’t find it too sweet. I would be interested in seeing what effect sugar has on the texture of brownies, so this is something to play around with in the future.

Why wasn’t it perfect?

One issue I had with it was that it seemed a bit oily, especially on the bottom. I did grease the tin with coconut oil (as I do with all of my baked goods), but I don’t think I overdid it.

It also didn’t have a flaky top. Boo. 

Rating of Brownie Recipe 1: 8.5/10

Brownie on a plate
Print Recipe

The Brownie Quest Brownies: Attempt I

An experimental recipe, scored a respectable 8.5/10. Dense and fudgy, great even a few days late. Sadly, no crackly top 🙁
Prep Time15 minutes mins
Cook Time35 minutes mins
Total Time50 minutes mins
Course: Dessert
Keyword: Brownie, Experiments, Recipe
Servings: 16 squares

Ingredients

  • 8 oz baking chocolate bar
  • 1.5 cup granulated sugar
  • 6 tbsp vegan butter
  • 2 tbsp ground flax seeds (prepackaged vegan egg replacement powder will also work)
  • 6 tbsp water
  • 2/3 cup flour
  • 1 pinch salt
  • 1/2 cup chocolate chips
  • 1/2 cup chopped walnuts

Instructions

  • Preheat the oven to 325°F.
  • Grease an 8" square baking pan and line it with parchment paper.
  • Make egg replacement: Put 2 tbsp of ground flax seeds and 6 tbsp of water into a small bowl. Mix, and let sit. (You can also use packaged egg replacer if you prefer.)
  • Melt the baking chocolate bar and butter a heatproof bowl over simmering water, stirring occasionally until smooth. Remove from the heat.
  • Using a large spoon, beat the sugar and salt into the chocolate mixture.
  • Beat in the flax egg.
  • Add the flour and mix until combined.
  • Pour the batter into the prepared pan.
  • Bake for 30-35 minutes, until a tester inserted into the center comes out clean.
  • Remove from oven and cool for at least 10 minutes. Let cool completely before cutting or removing brownies from pan.

Recipe 2

Pan of brownies

Recipe 2 was based off of the “Classic Chocolate Brownies” recipe. This had a few more ingredients, like baking powder and vanilla, so I figured it would turn out more cakey.

Recipe 2 was still good! As a person who prefers the corner piece, I actually preferred the crust on this one better – Recipe 1 didn’t have much of a crunchy crust. 

This recipe was sweeter, although again, this was my fault. You could also detect the sugar particles as you were eating the brownies. This recipe was made with brown sugar rather than white sugar, so maybe working to dissolve the sugar more would solve this issue. 

As mentioned before, Recipe 1 was better over time.

I didn’t notice all that much of a difference between the two on the first day, but Recipe 2 felt drier and slightly cakier as the days went on. I think an important part of baked goods, especially when you have a small family like mine, is how well they save on your counter.

Rating of Brownie Recipe 2: 7/10

Print Recipe

The Brownie Quest Brownies: Attempt II

An experimental recipe, scored a 7/10. Sweeter and a bit cakier, but with a good outer crust.
Prep Time15 minutes mins
Cook Time30 minutes mins
Total Time45 minutes mins
Course: Dessert
Keyword: Brownie, Experiments, Recipe
Servings: 16 squares

Ingredients

  • 4 oz baking chocolate bar
  • 1/2 cup vegan butter
  • 1 ½ cups brown sugar
  • 2 tbsp ground flax seeds (prepackaged vegan egg replacement powder will also work)
  • 6 tbsp water
  • 1 cup flour
  • 1/4 tsp baking powder
  • 1 pinch salt
  • 1/2 cup chocolate chips
  • 1/2 cup chopped walnuts

Instructions

  • Preheat the oven to 350°F.
  • Grease an 8-inch square baking pan and line with parchment paper.
  • Make egg replacement: Put 2 tbsp of ground flax seeds and 6 tbsp of water into a small bowl. Mix, and let sit. (You can also use packaged egg replacer if you prefer.)
  • In a heatproof bowl over simmering water, melt the chopped baking chocolate and butter together, stirring occasionally until smooth. Remove the bowl from the heat and let cool to room temperature.
  • Mix the brown sugar and vanilla into the chocolate mixture.
  • Add the flax eggs and mix well.
  • In a bowl, sift together flour, baking powder, and salt. Slowly fold the flour mixture into the chocolate mixture until combined.
  • Mix in the chocolate chips and nuts. Pour the batter into the prepared pan.
  • Bake for 25 to 30 minutes, until a tester comes out clean.
  • Remove from the oven and cool for at least 10 minutes before cutting.

So what am I going to try next time?

  1. Actually read the frickin’ recipe correctly.
  2. Research how to make the top of brownies flaky.
  3. Try recipe 1 as it was originally written to see what the original sugar content was like

If you are interested in trying my experiments for yourself, I have included the recipes (complete with my own errors) within the text above. I have, however, re-sized them to be full recipes, so you don’t have to make them in tiny tins like I did!

Stay tuned for more Brownie Quest adventures.

Filed Under: Blog, Brownies, Desserts Tagged With: brownies, experiments, recipes

« Previous Page

Primary Sidebar

Recent Posts

  • Baking 101: Vegan Egg Wash
  • Kitchen Tools 101: Kitchen Scales
  • How To Veganize Recipes: A Guide
  • Ingredients 101: Non-Dairy Milk
  • How To Convert Baking Soda To Baking Powder In A Recipe

More Cool Stuff!

Vegan Baking 101: Vegan Butter Substitutes

The Brownie Quest: Attempts 1 and 2

Ingredients 101: Baking Powder

Cup of hot chocolate

What’s The Difference Between Cocoa Powder And Cacao Powder?

  • Instagram
  • Pinterest

Copyright © 2025 The Brownie Quest on the Brunch Pro Theme