• Skip to primary navigation
  • Skip to main content
  • Skip to primary sidebar
  • Home
  • About
  • Blog
  • Baking 101 Index
  • Contact

The Brownie Quest

Blog

Ingredients 101: Baking Powder

February 10, 2021

Baking powder spilled from teaspoon

Baking powder.

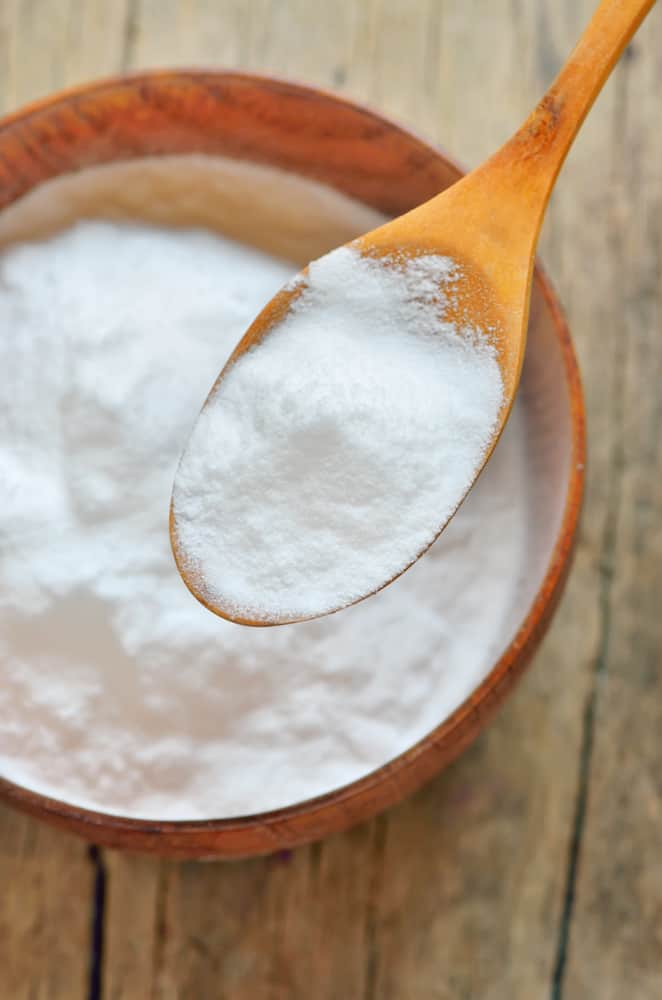
It’s a plain, white powder that’s in pretty much everyone’s kitchen. It looks similar to baking soda… but is it? What exactly does it do when you add it to your baking?

Let’s find out!

Before Baking Powder

First, to understand why it’s a product we use today, let’s start by exploring why baking powder was invented in the first place. 

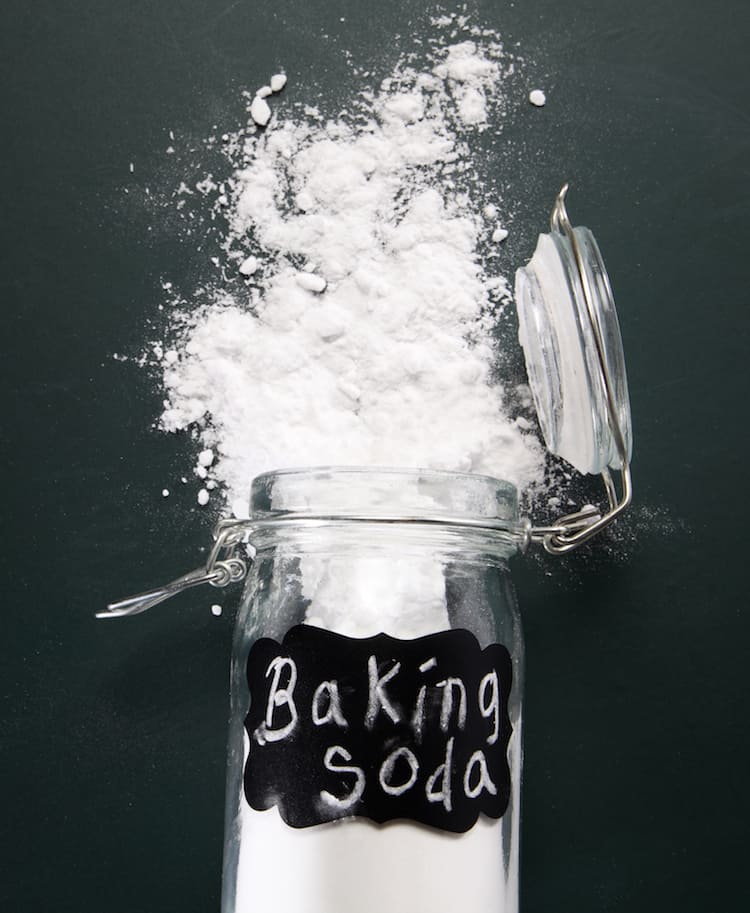
I have already written up an in-depth history of life before baking soda and powder, so be sure to check out my article about baking soda! But here’s a brief summary to get you caught up.

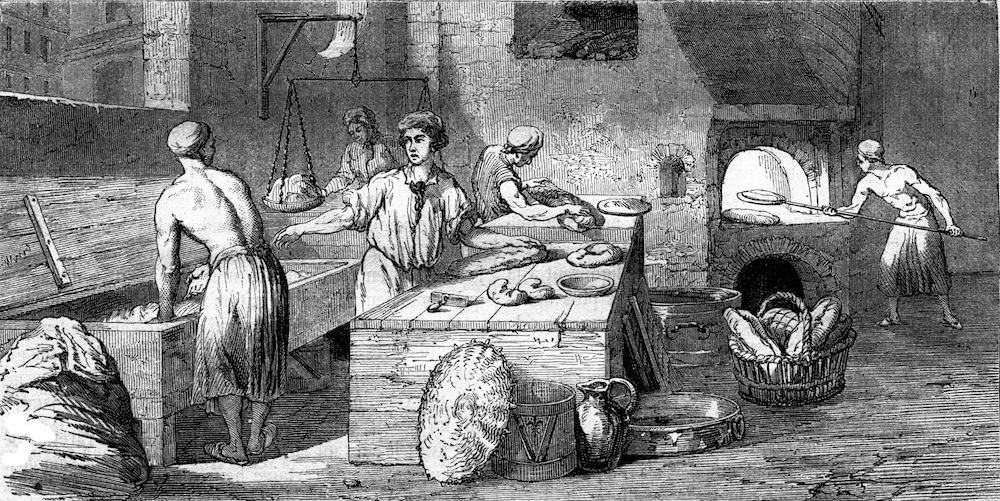
Basically, bread needs a leavening agent to create air bubbles to help it rise and give it structure. Before leavening agents like baking soda and powder went on the market, bakers had to use homemade yeast (created from a flour-water starter) or brewer’s yeast (obtained from brewers or distillers). These worked, but bread took hours to rise and could impart a bitter taste into baked goods.

In the 1600s came the invention of pearlash. This was made from fireplace ashes. Housewives would soak and boil their ashes, resulting in a white alkaline salt-like powder that they could use for baking.

Pearlash was a decent solution; it was shelf-stable and much faster rising than yeast. But it wasn’t perfect by any means. On top of the fact that you had to literally boil your fireplace ashes, pearlash also gave baked goods a distinctive ashy taste (and no wonder!).

So bakers, housewives, and chemists alike began to experiment. They knew there must be a better solution out there that tasted good and didn’t take forever to rise.

And then in the mid-1800s, a chemist finally figured out how to make sodium bicarbonate, or baking soda.

Baking Soda and Cream of Tartar

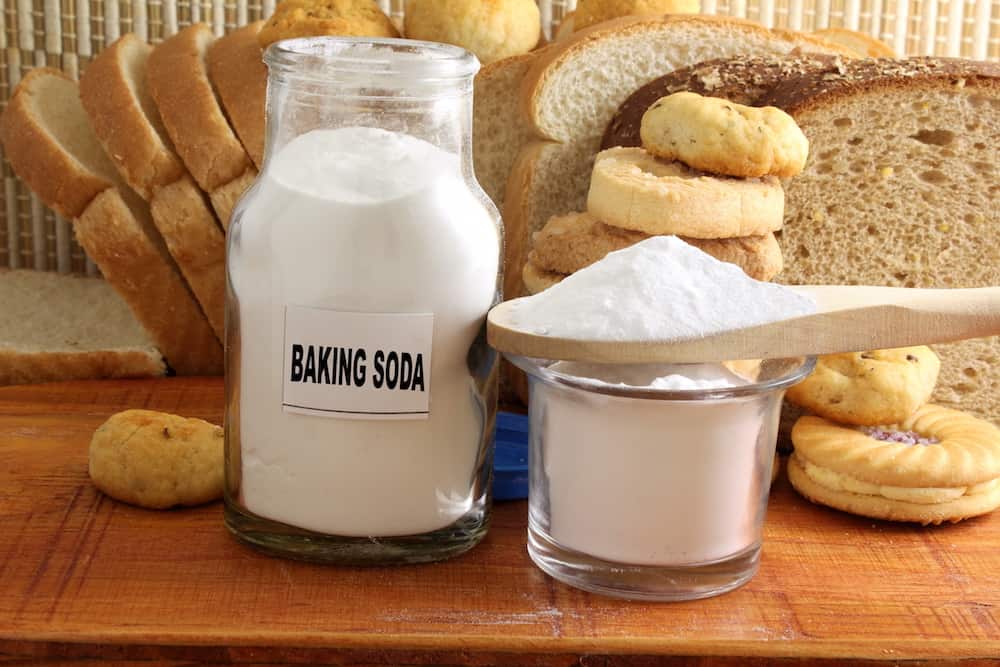
Baking soda revolutionized people’s kitchens. They could now bake breads, cakes, and other treats in a fraction of the time (and with none of the aftertaste that yeast and pearlash imparted!).

At around the same time, a product called cream of tartar also came to market.

Also known as potassium bitartrate, cream of tartar is a byproduct of winemaking. Basically, as the grape juice ferments, potassium bitartrate precipitates out and crystalizes in the wine casks. You may have found crystallization yourself on grape products, from wine corks, empty wine bottles, chilled grape juice, to homemade grape jam. 

These crystals are then collected off of the wine casks and treated to create the cream of tartar, which you can buy in the supermarket.

Wine: significantly more tasty than cream of tartar, but not as useful when it comes to baking.

So what is the purpose of cream of tartar? How is it related to baking soda or powder?

Well, baking soda isn’t a complete leavening agent all on its own. You can’t add it to a dough or batter by itself and have your bake rise. Baking soda only activates in the presence of an acid. 

And cream of tartar is an acid – a non-liquid, shelf-stable acid.

So rather than having to add lemon juice or vinegar into their baked goods, bakers and housewives could now use a combination of these two powders to get their baked goods to rise, with no extra liquid or flavors.

And that was pretty damn revolutionary.

Unfortunately, it was also a bit inconvenient. You had to purchase both of these products separately from the local chemist, and you had to keep them apart in your kitchen to prevent them from reacting before you baked with them. There was no shelf-stable, all-in-one product…

Until baking powder arrived on the scene.

Baking Powder

In 1843, English chemist Alfred Bird set out to make a new sort of leavening agent. His wife Elizabeth was allergic to both yeast and eggs, and he wanted to find a way so that she could eat bread. (What a good partner.)

The challenge, of course, was to figure out a way to combine baking soda and cream of tartar without them reacting. He ended up mixing them with starch as a buffer, which meant that the product would only react when it got wet.

Bird’s Baking Powder was mostly promoted to armies and explorers, rather than the public market. Bird also didn’t patent his product, and was beaten to the punch a few years later by another chemist. But this product made life a lot easier for bakers, and new cakes and quick breads started being invented.

Bird’s Baking Powder was single-acting. That means that it starts reacting as soon as it gets introduced to liquid. While it’s effective, it also means you need to get your baked goods in the oven straight away, or they might not rise properly.

Back cover of The Rumford Cook Book (1910)

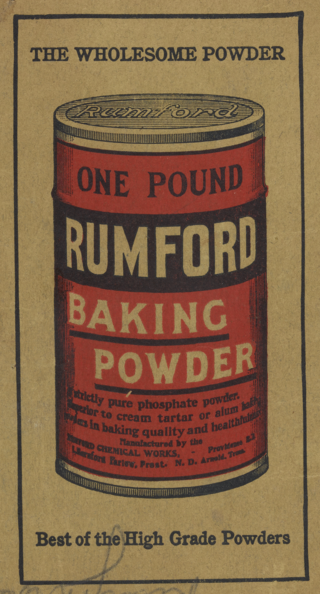
It wasn’t until 1869 when the first double-acting baking powder came to market. Double-acting baking powder reacts twice during the baking process: first when it combines with moisture, and second when heat gets involved. This means that it leavens twice throughout the baking process, giving you more consistent texture and allowing you more leeway on timing.

The first double-acting baking powder was Rumford Baking Powder. Fun fact for you: they originally marketed it with the name Horsford’s Yeast Powder. So in another universe where that name caught on, I’d be writing a post entitled “Ingredients 101: Yeast Powder.” Mmmmm!

However, it wasn’t until 1890 that baking powder really started to be marketed towards housewives and the general public. Life was about to get a lot easier in the kitchen.

Aluminum and Baking Powder

In the US, however, there was an issue. Wine – and by extension, cream of tartar – came from France. It was expensive to import, complicating the production of US baking powder.

So in the 1880s, companies started producing baking powders containing alums (or aluminum-containing acid compounds). These were a lot less expensive to produce, plus they were double-acting. Bakers also needed less of the alum-based baking powders than the cream of tartar-based ones.

So not only did baking powder become cheaper, it became more effective. The companies producing cream of tartar-based products freaked out at their threatening new competition.

William Ziegler, the head of one of the cream of tartar companies, started running negative advertising and using bribery to convince customers that aluminum was toxic to consumers. He even went to legislators to try and fight it legally. (Ironically, during this time, his company actually changed one of their secondary brands to an aluminum formula. Gotta make that money while you’re fighting the battle, even if it goes against your public beliefs!)

Ziegler ended up losing the legal fight, and by 1970, his company stopped making cream of tartar-based baking powders. In fact, most baking powders today contain alums.

But this concept that aluminum in baking powder is toxic is still around to this day. So is it true?

Turns out, there is little scientific support that it’s dangerous. Aluminum is an element that naturally exists in small amounts in a lot of foods, so having it in your baking powder is no different.

If you’re really worried though, there are aluminum-free brands on the market today! Some people have noted that aluminum baking powder can make certain baked goods taste metallic. I’ve personally never noticed this, but if it bothers you, you may want to consider an aluminum-free brand.

Conclusion

It might have taken decades of research to get there, but today, baking powder is common enough that you can find it in pretty much anyone’s kitchen. If you enjoy eating delicious baked goods as much as I do, you’ve got baking powder to thank for it.

Filed Under: Baking 101, Blog, Ingredients, Science Tagged With: baking, baking 101, baking powder, baking science, baking soda

Ingredients 101: Baking Soda

February 4, 2021

baking soda on spoon

If you’ve ever made a cake, cookies, quick breads, or muffins before, chances are you’ve used baking soda. You might have even cleaned with it, or slipped a box into your fridge to make it smell better.

It’s a ubiquitous part of the modern kitchen and home.

But what is baking soda? Why does it work? And has it always been around?

Let’s get to answering these questions and demystifying this product!

Before Baking Soda

If there’s one thing to learn about humans, it’s that we have always loved alcohol and carbs.

Throughout history, pretty much wherever you go, people have eaten bread in some form. And while flatbreads and crackers are perfectly tasty, leavened bread – that is, bread that’s been risen to develop flavor and texture – tastes even better. Throughout most of history, they achieved leavening through yeast.

Yeast

black and white illustration of old fashioned bakery
Way back when, baked goods took hours to make
(illustration by Magasin Pittoresque, 1857)

While today, we can buy dried yeast from the supermarket in conveniently pre-measured packets, it wasn’t so easy for our ancestors. They had to make it themselves! 

They did this a few ways. Some bakers, especially professional bakers, would obtain brewer’s yeast from local brewers or distillers. The byproduct of alcohol fermentation, brewer’s yeast was effective at making baked goods rise. However, it would sometimes lead to the final bread or cake having a bitter flavor like beer. Not ideal.

Most bakers, especially housewives, would make a starter themselves out of flour and water. If you’ve ever made a sourdough starter, you’ll know what I’m talking about. That starter gets really smelly the longer it sits around – in a good way! You can then incorporate part of this starter into your bread dough, and the good bacteria in your starter will release carbon dioxide, leavening your bread for you.

But there’s a problem with that. Making your own yeast is an endeavor. You have to make it and maintain it, and it’s easy to have your starter go bad on you, whether from fluctuating temperatures or unwanted bacteria. Then you have to start it all over again.

And then there’s another issue. Making bread with this yeasty starter took a long-ass time. While modern breads, made with quick-action dry yeast, take only an hour or two to rise, that wasn’t the case back then. Like a sourdough loaf today, old-fashioned breads took half a day or even a full day to rise.

That’s a lot of work.

Is there no easier way ?!

Pearlash

One solution came about in the 1600s, when people discovered a new leavening agent called pearlash. This was an alkaline, potassium-based salt, a cousin to modern-day baking soda.

fireplace
Fireplace ashes. Mmmm, delicious.

Housewives and bakers would make it by soaking their fireplace ashes in order to make lye. They would then boil that lye to dehydrate it and leave the white, powdery alkaline salt.

Like baking soda, pearlash was a chemical leavener. When exposed to an acid such as lemon juice, the potassium carbonate in the pearlash would fizz, producing carbon dioxide, which would help raise breads and cakes in far less time than yeast.

It was also a lot more stable than yeast, as it could be stored easily and wouldn’t go bad if it wasn’t maintained.

But the process of soaking and boiling your fireplace ashes was still a lot of work. And since pearlash was made with ashes, it gave a distinct smoky, slightly bitter flavor to baked goods. While this might work for some recipes, it wasn’t the perfect solution to replace yeast.

So there was no super-easy, quick, or taste-free way to bake leavened goods, not up until the mid-1800s. Making your own yeast or pearlash and rising your bread for a million hours was the way of the world for a long-ass time.

And then, bam. A new product hit the market, and her name was baking soda.

Baking Soda: The Origin Story

In the late 1700s, a French chemist named Nicolas LeBlanc figured out a process to create sodium carbonate, or soda ash, from common salt and a series of chemical reactions. It was later discovered that you can make baking soda from sodium carbonate and carbon dioxide.

By 1846, the first factory to make baking soda was established in America. But the LeBlanc process was pricy and not very convenient. Manufacterers couldn’t keep up with the demand for this new product.

In the 1860s, a new method came onto the scene: the Solvay process. Similar to the LeBlanc process, this method is a series of chemical reactions that forms soda ash, which is then refined to create baking soda. This method was more cost-effective and produced comparatively less pollution. It was quickly adopted around the world – and is even still used to this day.

However, the chemicals used in this process are still pollutants and difficult to dispose of without creating a negative environmental impact. So these days, manufacturers are relying more heavily on mining to reduce their environmental impact. 

Soda ash can naturally be found in a mineral called trona. The biggest natural deposit of trona in the world can be found in the Green River Formation in Wyoming and Utah. This mineral is common and plentiful, and there’s less of an environmental impact mining it than making it artificially.

While factories using the Solovay process can still be found around the world, most American baking soda is mined from natural trona deposits.

Baking Soda And Baking

So enough history. Let’s get back to baking.

Why baking soda? What makes it such an important, useful ingredient?

baking soda next to cookies and bread

Baking soda is an alkaline salt, which means that it reacts to acidic foods like lemon juice. When this happens, it fizzes, creating carbon dioxide. This creates air bubbles, leavening (or rising) your baked goods and creating a great, light texture.

It’s also fast-acting, so you can put your cakes, quick breads, and cookies straight into the oven without letting them rise for a few hours first, like you would with yeast.

But why is baking soda the best choice? Why has it been the go-to solution since the 1860s?

One reason why baking soda is so useful is that it’s a great, all-purpose choice. Remember how we talked about pearlash earlier, that stuff that they made from fireplace ashes? Unlike pearlash, baking soda doesn’t have a strong aftertaste when you bake with it, letting your other flavors shine as they should.

Baking soda is also cheap and plentiful. Whether mined or artificially made, you can now buy one-pound boxes for under a dollar. That means it’s an easily accessible product for just about everyone.

And remember all that work bakers used to go through, creating and maintaining their own yeast? Baking soda is a simple, low-maintence product. Once you buy it, you can store it on a cool, dry shelf and have it last you for months.

Overall, it’s very clear to see why baking soda has been the best solution for chemical leavening since the mid-1800s.

Even better, it also has many other uses around the house!

What else is baking soda good for?

If you’re a vegan – or just trying to eat more plant-based – chances are you’re at least a little bit of a hippie. You’re probably looking for some more natural, non-toxic ways to clean your house.

As it turns out, baking soda is great for cleaning. It’s gentle but lightly abrasive, so you can scour with it without scratching up your house. I regularly use it to scrub out tea stains from mugs, or grime from sinks.

It’s also a great deodorizer. One time, I left my favorite sweater lie around while it was damp, and it developed a gross, musty smell. 🙁 As it turns out, you can deodorize clothes by washing them with a cup of white vinegar, and then another wash with a cup of baking soda (don’t put laundry soap in with either of these wash cycles).   

My sweater now smells like new!

But why is baking soda so good for cleaning?

Without getting too technical, baking soda balances the pH levels of things it comes into contact with. Most smells are acidic, and baking soda reacts to the acidity of the smell particles, neutralizing them and making them less acidic (and less smelly).

This works the best when you’re scrubbing something (like a cutting board) with baking soda paste, or washing your laundry in water with baking soda. That’s because you’re directly applying the baking soda to source of the smell. 

It’s inconclusive if putting a box of baking soda in your fridge really works to make it less smelly. The chance of all of the smelly vapors in your fridge being absorbed by that box of baking soda isn’t likely.

Despite the debate about its effectiveness, the belief that a box of baking soda in your fridge will help is very pervasive: half of American fridges have a box of baking soda in them! It proves that good marketing can go a long way.

Conclusion

Whether you’re baking or cleaning, baking soda is a household staple that’s really modernized home life. This humble powder does a lot for us.

Let’s just be thankful we don’t have to boil our fireplace ashes anymore.

Filed Under: Baking 101, Blog, Ingredients, Science Tagged With: baking, baking 101, baking science, baking soda, ingredients 101

Baking 101: How To Measure Flour Correctly

January 15, 2021

Jars of flour

A blog post about measuring flour?! 

I know what you’re thinking. What’s this even about? How can you possibly measure flour wrong? Don’t you just… measure it?

Actually, a lot of well-known bakers say that one major area where novice bakers go wrong is measuring flour! Especially when you’re working with a finicky recipe, like bread, it’s super important to get an accurate measurement of flour.

Even more forgiving recipes can have issues if you measure incorrectly.

So what’s wrong with too much flour?

This can result in dry, dense baked goods. 

Cookies and brownies can become too cakey. If you prefer this texture, you may purposefully add more flour to your recipes! But if you want the texture of the original, it’s important to measure accurately.

When you’re kneading bread, it can be tempting to keep adding flour to your countertop. This makes your dough less sticky and easier to work with. However, too much flour can alter the final texture, and you should only add flour if your dough seems too wet.

What’s wrong with too little flour? 

 Too little flour can make baked goods lack shape or have too wet or dense of a texture.

The gluten in flour helps baked goods keep their texture, so you may end up with shapeless bread or flat cookies. Your baked goods may also collapse while in the oven.

So basically, using the correct amount of flour while baking is super important. But the question remains…

How do you scoop flour?

Let’s go over the three main ways you can measure flour, from best to worst.

The Best Method: Measure Flour By Weight

The best method by far is measuring by weight. Using a scale will give you exactly the same amount every time, no matter how you scoop the flour!

For reference, a standard cup of flour is 120 grams, or 4.4 ounces (the exact weight may vary depending on the type of flour, but this is the weight I use for a cup of flour). When you measure by weight, you can get a perfect 120 gram cups of flour every time!

You’ll need to invest in a small kitchen scale for this, like the one shown in my pictures. They’re not too expensive; I got mine for about $15, and it’s absolutely changed the way I bake.

Flour being scooped into a bowl sitting on a kitchen scale

Using a kitchen scale is simple. Just put your bowl on the scale (remember to hit the ‘tare’ button to reset the weight in order to start weighing your ingredients from 0 grams). Next, scoop or pour flour until the number on the scale hits the amount you need for the recipe.

Not only is it more accurate, it’s also faster. If your recipe calls for a lot of flour (I frequently make breads that need 500 grams of flour), you can pour straight from the bag. It really saves a lot of time.

Bowl sitting on a kitchen scale, reading 120 grams.

One caveat: you may run into recipes that measure by volume (cups, teaspoons, etc.) rather than metric weight, especially if you’re American. In this case, if you want to use your scale, you would have to convert all your ingredients to metric. And since every ingredient weighs differently (for example, a cup of sugar weighs more than a cup of flour), converting to metric takes time.

While I love my kitchen scale, if I’m using a recipe that calls for cups, I don’t bother converting to metric. Most recipes will turn out fine if you’re a few grams of flour off!

The Second Best Method: Scooping Flour Into A Measuring Cup

If you’re an American, you’re probably used to using a scoop and putting the flour into a measuring cup (that is, measuring by volume). This isn’t one-hundred percent accurate, but it’s still the best method to use if you don’t have a kitchen scale.

By scooping it into a cup, you won’t compact the flour. This means you’ll end up with a decently accurate measurement. Just be sure not to tap your measuring cup or press down on it with the scoop! This can make the flour settle or compact, and you may end up using more than you need.

To use this method, just place the flour gently into the cup with a scoop or a spoon.

Flour being scooped into a measuring cup

Level it off with the back of a knife, leaving a flat top.

Flour being leveled off with a knife

In this test, my cup of flour weighed 128 grams, or 8 grams more than a standard cup of flour. That’s pretty accurate! In most recipes, being off by a few grams of flour isn’t going to change the outcome.

Measuring cup sitting on a kitchen scale, reading 128 grams.

Worst Method: Scooping Straight From The Flour

Putting the measuring cup directly into the flour and scooping up a whole cup is definitely the most inaccurate method. Please don’t do this!

Flour being scooped directly into a measuring cup
No!

Remember how I mentioned previously that tapping the measuring cup or pressing down on the flour could lead to inaccurate measurements?

This is the prime example of that. Scooping directly from the source compacts the flour, packing it into your cup and giving you way more than you need.

When I did tried this out, my cup of flour weighed 155 grams, or 35 grams more than a standard cup of flour. That’s definitely far more flour than you need for any recipe!

Measuring cup sitting on a kitchen scale, reading 155 grams.

With this much extra flour, your finished product will likely have noticeable texture differences and will be too dry or dense. That’s especially true if your recipe calls for multiple cups of flour.

I hope this post has helped you understand how to scoop flour!

Filed Under: Baking 101, Blog, Science Tagged With: baking, baking 101, baking science, flour, measuring

7 Solutions When Your Kitchen Is Basic AF

January 7, 2021

Wooden utensils in a pot

Have you ever read a super-good-looking recipe, and then looked up at your kitchen to see how small, basic, and sad it is?

I get it. I’m in my 20s, living in an apartment, and my kitchen is what you might consider basic af. While I’ve been slowly investing in some good kitchen tools, ultimately, I don’t have the professional tools that they have on baking shows. Case in point:

My old kitchen stove
Our ‘vintage’ oven. Note the stylish analog clock. (I may mock it a lot, but it’s baked me a lot of good stuff.)
  • I don’t have half as much counter space as I would like
  • Half our “kitchen supplies junk drawer” is cheap stuff from Target
  • My oven is from 1987 (aka the year my parents got married. It has an analog clock and everything. Vintage!)
  • Sometimes I think my microwave is haunted

You know, just little things like that. It’s fine. We live with it. (Please don’t kill me, microwave ghost.)

So what are you, an aspiring amateur baker, to do when your kitchen is tiny, and you don’t have all the fancy tools and counter space to make your life easier? Should you go out and buy a bunch of random kitchen stuff?

Not unless you really want to. 

Kitchen tools can make your life easier, but they can just as easily clutter up your already small kitchen. So only invest in them if you know you’re going to be using them frequently. But you can certainly make delicious food, no matter how basic your kitchen is.

Here’s some tips I’ve found while baking in my tiny apartment kitchen.

1. Choose multipurpose tools when buying new kitchen equipment

When it comes time to buy new tools, you might be overwhelmed by all of the options out there. As it turns out, there’s a tool out there for every possible use. An herb chopper. A citrus juicer. Even a banana cutter that will cut your bananas into perfectly even pieces.

But unless you know you’re going to make fresh pesto every week or put bananas on your cereal every morning, these items tend to be pointless clutter.

It’s often a better use of your money to purchase a really good knife and learn how to chop these things efficiently by hand. (It also means fewer dishes when it comes time to wash up!)

If in doubt, I’d always recommend purchasing kitchen equipment that can serve multiple purposes. A doughnut pan can only really bake doughnuts, but a muffin tin can make muffins, mini tarts, small deep-dish pizzas, peanut butter cups… all sorts of delicious things.

These multipurpose pieces of kitchen equipment won’t end up being clutter because you’ll be using them so frequently.

Again, it’s all down to what you use the most in your kitchen, and my favorites may not be of any use to you.

2. Get creative with tool use and understand shortcuts.

One of the best things about learning to cook is watching your creative confidence flourish in the kitchen. Once you learn the basics, it’s easy to experiment and start putting your own twists on things.

When your kitchen is basic, you might need to employ that creativity to make your life easier. Here’s some examples!

Cashews in a strainer

A lot of creamy vegan recipes use cashews. But if you’ve got a cheap blender, it can be a pain to get things totally smooth. Most recipes do mention this, but soaking cashews is a great shortcut to soften your cashew so that you don’t need to run your blender for half an hour.

Making cookies but you’ve realized you don’t have any cookie cutters? You can use the rim of a drinking glass to cut out circles.

Making pie crust but you realize you don’t have a rolling pin? A wine bottle will work in a pinch. (I have actually used this trick myself! I was traveling and really wanted vegetable pot pie for dinner.)

With a little bit of creativity, you can overcome any obstacle in the kitchen.

3. Make Google your friend

You probably already know this if you’re a citizen of the 21st century. But Google is your friend when you’re confused about something. Chances are, someone else has asked your exact same question. 

What spices are in pumpkin spice blend, and can I make it myself? 

Can I substitute for Worcestershire sauce? (Also, how the hell do you pronounce “Worcestershire”?) 

What is 200º Celsius in Fahrenheit?

Knowing the answers to your questions will help you become a better, more inquisitive baker. Take your time to really understand what it is you’ve just asked Overlord Google, and eventually, you’ll also become a more intuitive baker.

4. Substitute 

It’s not just tools that clutter up your life. It’s also the random ingredients you buy along the way. If you’re a vegan who frequently cooks and bakes from scratch, you’re gonna end up with a lot of random crap. Tapioca starch! Garam masala spice! Fancy flaked sea salt!

While following a recipe to the tee will give you the results you want, part of being a good vegan scientist is learning that substitutes can work just as well. This is especially important if you live in a small place and are not keen on cluttering up your kitchen.

Just understand what the function of your ingredients are, and you can likely replace them with things you already have!

An example: your recipe needs tapioca starch, but you don’t have it? Well, tapioca starch’s function is to thicken things up. Another starch, like corn starch, will work just as well. Flour might work too, depending on what it is you’re baking.

Another example: spice blends like taco seasoning, garam masala, and pumpkin spice are combinations of other spices – spices with multiple uses. To save money and space in your kitchen, it’s super easy to make your own versions of these spices. Just look online for recipes.

5. Learn what can’t be substituted

Jar of baking soda

Having said that, not everything can be substituted. If you’ve been a vegan for some time, you probably know that flavor is everything in vegan food. It’s the spices, sauces, and textures that really make a dish pop and make it exciting to eat. 

If you’ve been baking for a while, you know that something like baking soda can’t really be replaced in a baked good without disastrous results.

But there’s other things you should invest in that aren’t so obvious. 

An example from my own kitchen: my mom frickin’ loves pad thai. It’s not a stretch to say that she likes it more than she likes most people.

But we always struggled to make a great-tasting pad thai at home. The recipes we tried tasted good, sure, but not amazing. Until we found The Recipe. It turns out that the secret we were missing was tamarind paste. 

This is a sticky paste made from the pod fruits of the tamarind tree. It tastes tangy, and it’s used in a variety of cuisines. 

We’d never heard of it before, but we went ahead and bought it to try out. It was an excellent purchase. We now make The Recipe several times a month, and we’ve made other recipes using tamarind paste too.

So basically, don’t be afraid to buy interesting new ingredients to try them and play around with them. Life is short, and you’ll never know what you’ll end up loving.

6. Scale recipes down.

It sucks seeing food go to waste if your household is just you and your partner/roommate/mom/your very polite dog Gerald who sits at the table and eats bread like a true gentleman.

But if you’re in a small kitchen with an equally tiny refrigerator, it’s hard to store leftovers from a big meal. Sigh!

So if you want to bake a recipe that’ll turn out to be a whole kilogram of bread, or 50 cookies, put your fourth grade math skills to use and use the power of fractions to cut recipes in half. 

This has the added benefit of allowing you to practice baking more often, as you won’t be eating the same stale leftovers for a few days!

7. Learn your oven.

Let’s face it. If you’re renting, if you live in an older home, your kitchen appliances might not be the best or newest out there. They might have some… quirks.

As mentioned before, my own oven will be 34 years old this year. It bakes well, but I’ve found that I usually need to leave things in for a few more minutes than most recipes call for.

Pay attention to your own oven when you’re baking. Does it bake things evenly, or does it tend to cook things unevenly? Does it tend to bake faster or slower than most recipes call for? 

Knowing this will help you budget your time more efficiently and help you master baking in even the most basic of kitchens.

Filed Under: Baking 101, Baking Tools, Blog Tagged With: baking 101, baking science, kitchen, tips

What’s The Difference Between Metal, Glass, and Silicone Bakeware?

December 11, 2020

About a month ago, one of my metal cake tins got scratched up and ended up rusting irreparably. Rest in peace, old friend.

Since I couldn’t use a rusty old pan anymore, I was in the market for a new one!

As it turns out, if you’re looking to get new cookware or replace your cookware, there’s a lot of options out there. There’s cheap ones from Target and Amazon and expensive ones from Williams Sonoma and Le Creuset.

There’s all different sizes and shapes, from round ones to ones shaped like cartoon characters.

And there’s bakeware made out of a number of different materials – metal, glass, ceramic, and silicone.

But does it really matter what material your bakeware is made of?

As it turns out – yes! Let’s cover all of your options so you’ll know what to go with if you need new bakeware.

Metal

Muffin tin

Metal bakeware is an all-around great, versatile option for anything you might want to bake.

And if you want your cake to have a shape other than a circle or a rectangle, metal is one of the best ways to go. Metal pans come in tons of shapes, from fancy bundt tins to pans shaped like numbers or animals. While maybe not the way to go for everyday cakes, shaped cakes are a fun way to add some visual interest to your desserts.

Metal bakeware has the biggest range of materials, from aluminum to stainless steel to non-stick, so you may need to do some research to figure out what works best for your needs. (A post on this is coming soon!)

Cost

Metal bakeware is affordable. As one example, a single cake pans averages from $10 to $25 USD, depending on brand and quality.

More complex bakeware, such as bundt cake pans and springform pans, tend to cost $20 to $35 USD.

Durability

Metal bakeware is a durable option that can last you for years if you treat it with care. As mentioned previously, metal can scratch and discolor, so it’s best to clean it by hand. Metal can also warp if it’s exposed to extreme temperature differences (such as washing it under cold water right after it comes out of the oven).

I’ve had metal bakeware that’s lasted me for years though, so with gentle treatment, it’s a great investment.

Heat conduction

Metal pans are great at conducting heat – which is what helps gives your bakes color and texture. Darker-colored bakeware is going to get warmer than lighter-colored, so keep that in mind if you have an especially delicate bake that you don’t want to get overly brown.

How to keep it clean

For the most part, it’s best to hand-wash metal bakeware and leave it out to dry before putting it away. Certain types of metal can discolor, rust, or oxidize, depending on how you wash and treat it.

As well, a lot of metal bakeware can deteriorate over time when put in the dishwasher. Aluminum, for example, is vulnerable to scratching. And nonstick pans can lose their coating after too many trips through the dishwasher.

What is best to bake in it?

Metal of any variety is best for cooking cakes, cupcakes, muffins, and loaves.

Glass

Glass baking dish with apple crumble

Sturdy and versatile, glass bakeware will last you years if you get something of good quality (such as Pyrex). Glass is also a versatile option, as it doesn’t hold onto flavors and smells. This means you can bake both sweet and savory foods in it.

Cost

Glass bakeware ranges from around $20 to $50 USD for a set, depending on quality.

Durability

A good-quality glass bakeware should last you a very long time. We’ve had our set for years, and they’re still in excellent condition.

It’s important to note that cheaper glass bakeware may crack or chip on the edges. That’s why it’s worth it to go with trusted brands rather than the cheapest product on Amazon. You get what you pay for, after all.

Heat conduction

While glass doesn’t conduct heat quite as well as metal does, it will still give your baked goods a nice golden-brown finish. Glass also retains its heat for a long time, making it a great option for bakes like pies and casseroles, where you want them to be served warm.

How to keep it clean

Glass can be hand-washed or put in the dishwasher – though as with everything you stick in the dishwasher, double-check to make sure your bakeware is dishwasher-safe! It’s easy to soak and scrub glass, since you don’t have to worry about scratching it.

What is best to bake in it?

Glass bakeware works best for bakes you want to get crispy or keep warm as you serve it, such as pies, crumbles, casseroles, or baked pasta dishes.

Stoneware

Stoneware dish with food inside

Stoneware is made from clay or other naturally-found materials. Like pottery, it’s baked in a kiln and glazed to give it a nice finish.

The thing that makes stoneware stand out from other bakeware options is that it looks fancy as heck. They come in a variety of colors and give you that elegant feel. Some stoneware dishes out there look like actual works of art.

So if you’re a food blogger, or someone who wants to take very nice-looking photos of your food, or even just someone who wants to feel fancy every time you bake, stoneware dishes are worth it.

You can’t see through stoneware, though, which may be one downside if you like to look at your bakes to know if they’re done.

Cost

Stoneware is the most expensive option on this list, ranging from $30 to even $100 USD for a good-quality baking dish. A lot of upper-end brands like Le Creuset specialize in stoneware. Like with glass, you tend to get what you pay for.

Durability

Stoneware is a very durable material. However, be careful that you’re purchasing good-quality products and not just the cheapest thing off of Amazon. A quality brand will glaze its bakeware so that it will be resistant to chips and cracks. Since stoneware is expensive, you’ll want it to last you for years.

Heat conduction

Functionally, stoneware isn’t much different from glass. It gets hot, though not quite as hot as metal. It also heats evenly, allowing you to bake things to a nice golden-brown color. It also stays warm, perfect for meals and desserts that are tempting enough to go back for seconds.

How to keep it clean

Always let stoneware cool before hand-washing it. Any stuck-on food can be scrubbed away with a nylon brush. Stoneware can stain and discolor over time, but that doesn’t affect the flavor of your food.

Depending on your brand of stoneware, you may not need to use dish soap (similar to cast iron, some brands become seasoned over time and develop a non-stick surface!). Be sure to do research before you clean your new bakeware.

What is best to bake in it?

Like with glass cookware, stoneware works well for pies, pastry, crumbles, and savory dishes like casseroles. Pizza stones, which are made of the same material, are also great for making pizza!

Silicone

Silicone baking pan with loaf of bread

The newest type of bakeware out there, silicone just looks cool. It’s squishy, fun to play with, comes in bright colors, and can be made into any shape out there.

Perhaps the biggest benefit to them is that your bakes won’t stick! You don’t even have to grease or line the pans first. Just turn them over and your bakes will pop right out. This removes one step from your baking process.

Another huge benefit is how flexible silicone is. While other pans are bulky and heavy, you can store silicone pretty much anywhere. In that respect, they’re perfect for apartment living, where you don’t always have the space to store a lot of items.

This flexibility does have a downside; silicone bakeware is wobbly. You have to be careful not to spill your batter in the oven when you’re putting a cake in the oven. Be careful if you’re especially clumsy!

Cost

An average silicone cake pan costs between $10 to 20 USD. They sometimes come in sets of pans of multiple sizes, making them even less expensive overall.

However, you’ll want to make sure that you’re getting a good-quality pan. While this is true for every piece of bakeware, no matter its material, some cheaply made silicone pans may contain chemicals that you don’t want to be ingesting. So be sure to look for “food-grade” or “medical-grade” on the label before making your purchase.

Durability

High-quality silicone is very durable if treated gently. As long as you don’t use abrasive cleaners on it, silicone can last you for years. It can also bend and fold easily, so you can store it in even tight apartment spaces.

It can also be dropped with no issue, unlike glass and ceramic, perfect for all you clumsy bakers out there!

Heat Conduction

One of the biggest downsides to silicone is that it isn’t a good heat conductor. It doesn’t get hot or retain its heat in the same way that glass or metal do; if you touch a silicone bake pan that’s been out of the oven for a few minutes, it’s not hot. 

So if you’re wanting your baked goods to brown on all sides, you should choose another material to bake it. But if you’re wanting a delicate bake with little-to-no browning, silicone might be the perfect choice.

How to keep it clean

Double-check your bakeware to be sure, but most silicone is dishwasher safe. However, if you do decide to put it in the dishwasher, be sure to keep it away from any sharp objects that may damage it.

Silicone is super easy to clean however – you’ll never have to scrub on it for minutes to get stubborn food off. So it may be easier just to hand-wash, especially if you want to make sure it doesn’t get damaged.

What is best to bake in it?

Use silicone when making delicate cakes (that you don’t want to brown very much), cupcakes, muffins, and any baked goods that you don’t want to stick.

Filed Under: Baking 101, Baking Tools, Blog, Science

« Previous Page
Next Page »

Primary Sidebar

Recent Posts

  • Baking 101: Vegan Egg Wash
  • Kitchen Tools 101: Kitchen Scales
  • How To Veganize Recipes: A Guide
  • Ingredients 101: Non-Dairy Milk
  • How To Convert Baking Soda To Baking Powder In A Recipe

More Cool Stuff!

Vegan Baking 101: Vegan Butter Substitutes

How To Veganize Recipes: A Guide

Flour in a glass jar

Baking 101: Self-Rising vs. All-Purpose Flour

Kitchen Tools 101: Kitchen Scales

  • Instagram
  • Pinterest

Copyright © 2025 The Brownie Quest on the Brunch Pro Theme