• Skip to primary navigation
  • Skip to main content
  • Skip to primary sidebar
  • Home
  • About
  • Blog
  • Baking 101 Index
  • Contact

The Brownie Quest

Blog

Baking 101: Vegan Egg Wash

March 31, 2021

Variety of bread on black background

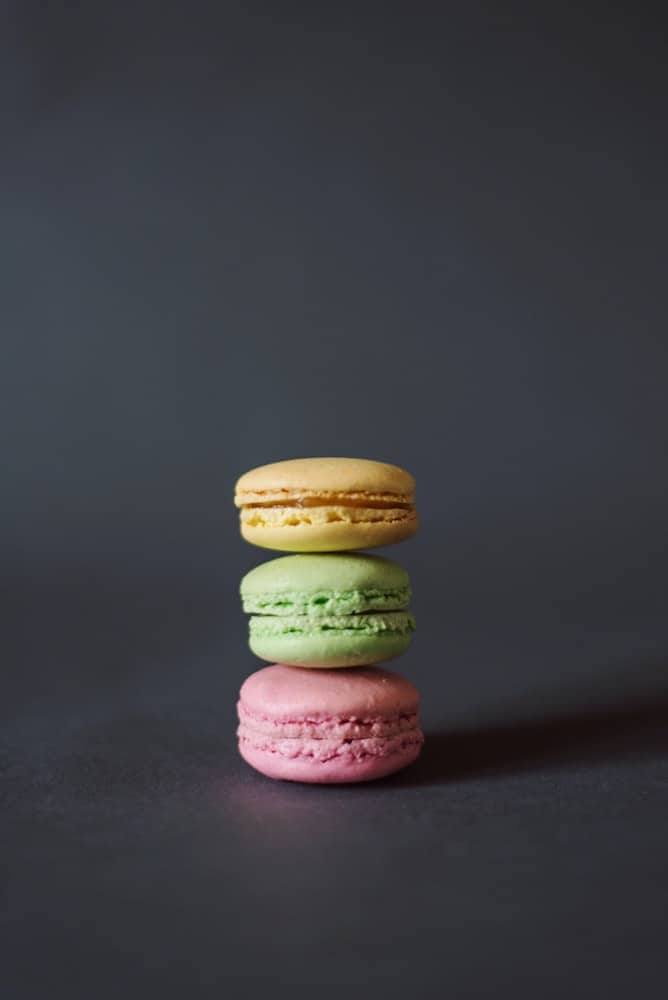
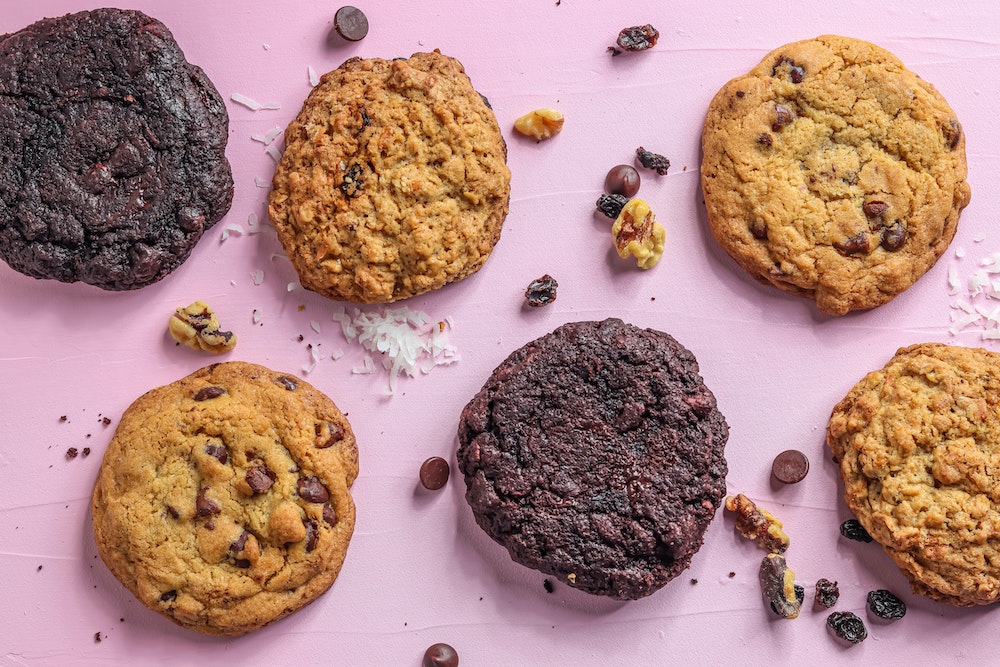
We eat with our eyes first. Don’t you love going into a bakery and seeing all of the beautiful things for sale? 

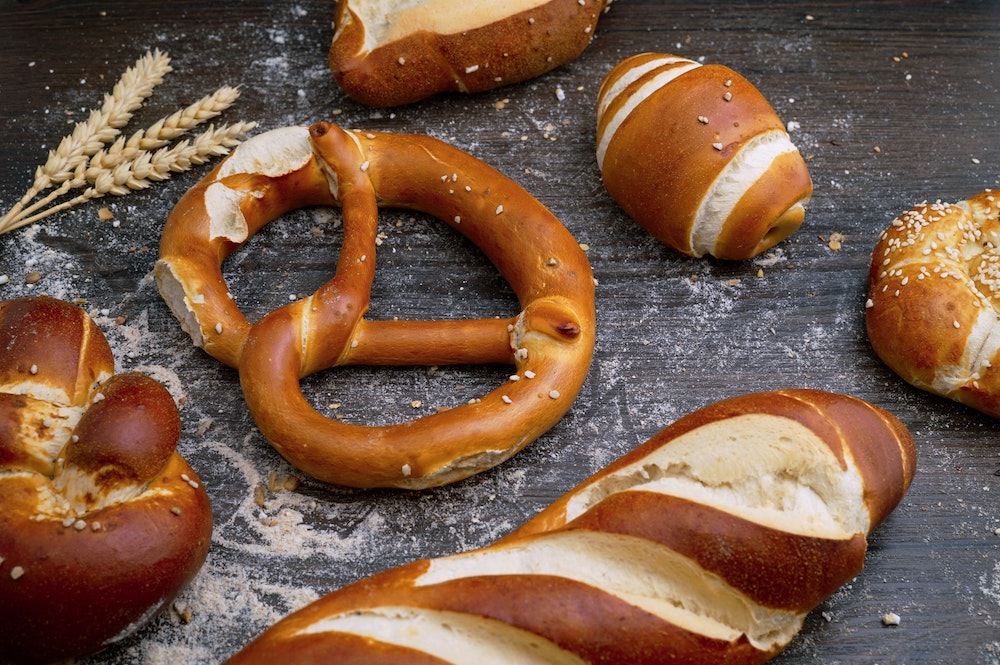
There’s just something super appealing about a bread roll, pretzel, or pie that’s beautifully golden brown with a slight shine. It looks more finished, elegant, and edible.

But what makes it look that way?

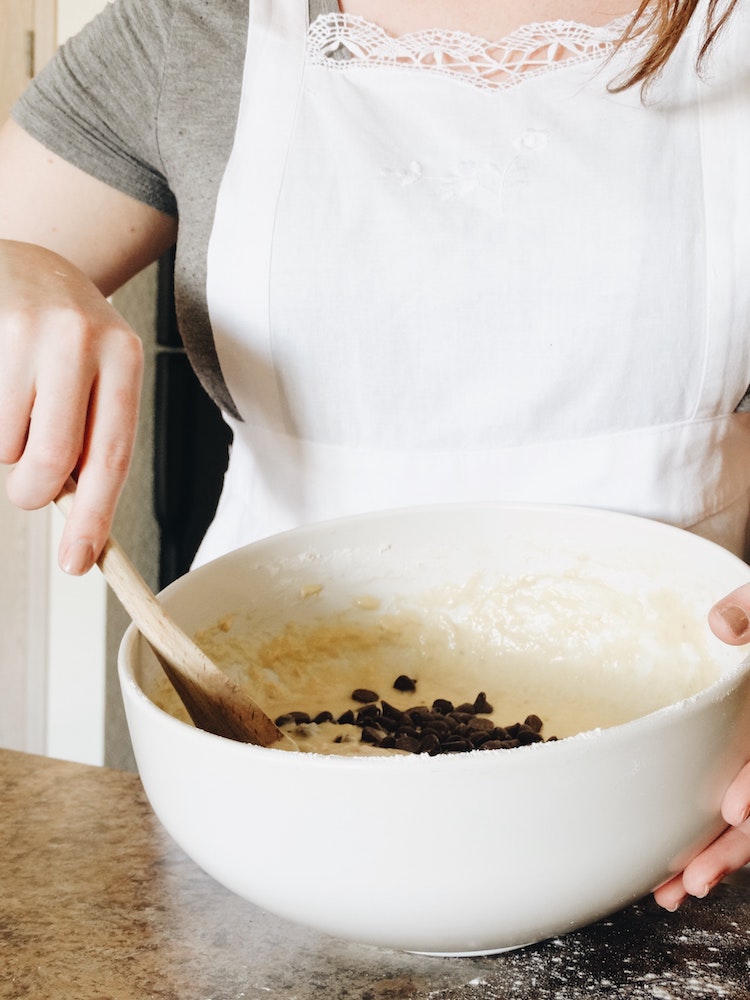
In many cases, baked goods— especially pastry and breads— are finished off with an egg wash. Obviously, with “egg” in its name, you can tell that it’s not vegan. But it’s worth talking about what an egg wash is so that we can replicate the effects without eggs!

What is an egg wash?

Basically, an egg wash is a beaten egg with added water, milk, or cream for spreadability. It is then brushed on top of a pastry or other baked item before it goes in the oven.

This makes your baked goods look better in several ways:

It adds color

Eggs contain protein. And like other protein-rich foods, when egg wash reaches a certain temperature, the enzymes in these proteins undergo a chemical reaction. This turns the enzymes (and the egg wash) brown and gives your baked goods a richer flavor.

It adds shine

Egg yolks also contain fat. This gives baked goods a nice, shiny glossy finish.

It can give structure

Egg wash can help seal pastry together so that the goodies within don’t leak all over your oven. This is important in giving your pastry a nice, clean look. It can also help seal in moisture, ensuring that your pastry or bread doesn’t get dried out in the oven.

So clearly, egg wash has a lot of important uses, both aesthetically and flavor-wise. But if you’re eating plant-based (or if you’re allergic to eggs), you can’t eat food that’s been egg washed. So what are you to do to replicate this effect?

Luckily, there’s a few super simple solutions that use ingredients that you probably already have at home! Let’s learn more about them. 

Liquid Sweetener (such as agave syrup or maple syrup)

Bottle of maple syrup

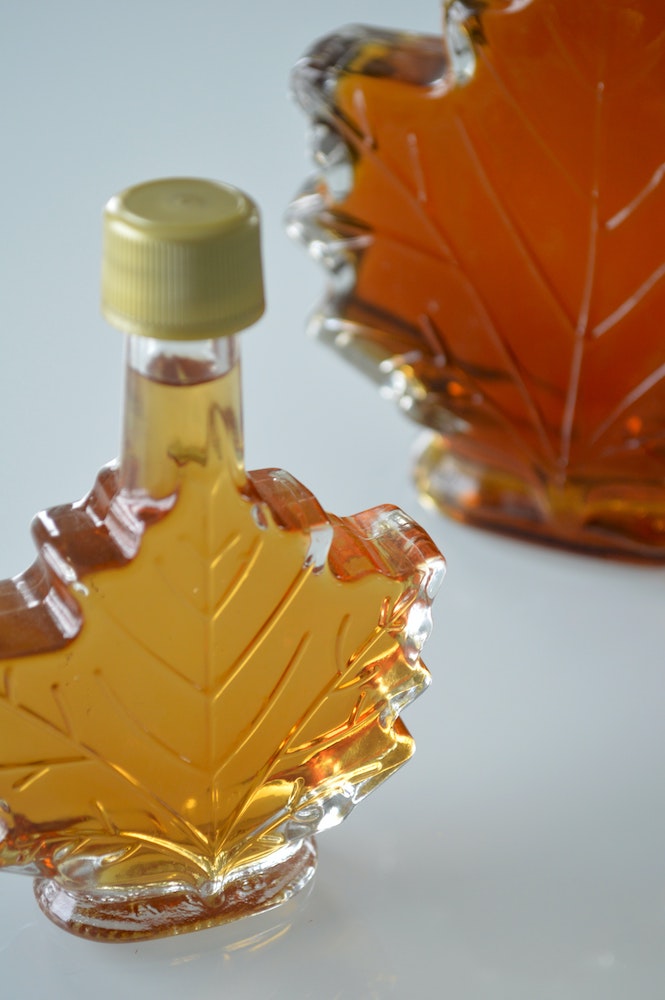
Using liquid sweeteners or syrups works well for glazing sweet bakes. As the glaze bakes, it will caramelize and give you a lovely, shiny, sweet finish and a golden brown color.

But which liquid sweetener is best to use? My personals favorites are agave and maple syrup.

Agave syrup is popular amongst vegans, since it’s a liquid sweetener that’s made by plants (rather than by bees). It’s sweeter than honey and sugar, as it has a high fructose content. Agave is light in color and doesn’t have a strong flavor.

You can also use maple syrup. It may result in a darker color or a slightly maple-y taste compared to agave— but this isn’t necessarily a bad thing! It may compliment your bakes.

Other liquid sweeteners will likely also work. One site I found even used a water and sugar glaze. But I’ve personally only used the two I’ve mentioned, so I can’t attest to the effectiveness of any other sweetener.

Syrup works best for: Any recipe that you’d like to have a sweet, glossy, caramelly finish.

Downsides: Sweet syrup doesn’t work well with savory baked goods.

As well, using syrup adds an extra step to your baking process. Usually, you add an egg wash prior to baking. But baking undiluted sweetener for a long time can cause it to brown quickly and even burn. For that reason, I would recommend brushing it onto the top of your baked goods five minutes before it’s finished baking. This way, it cooks into your baked goods without burning.
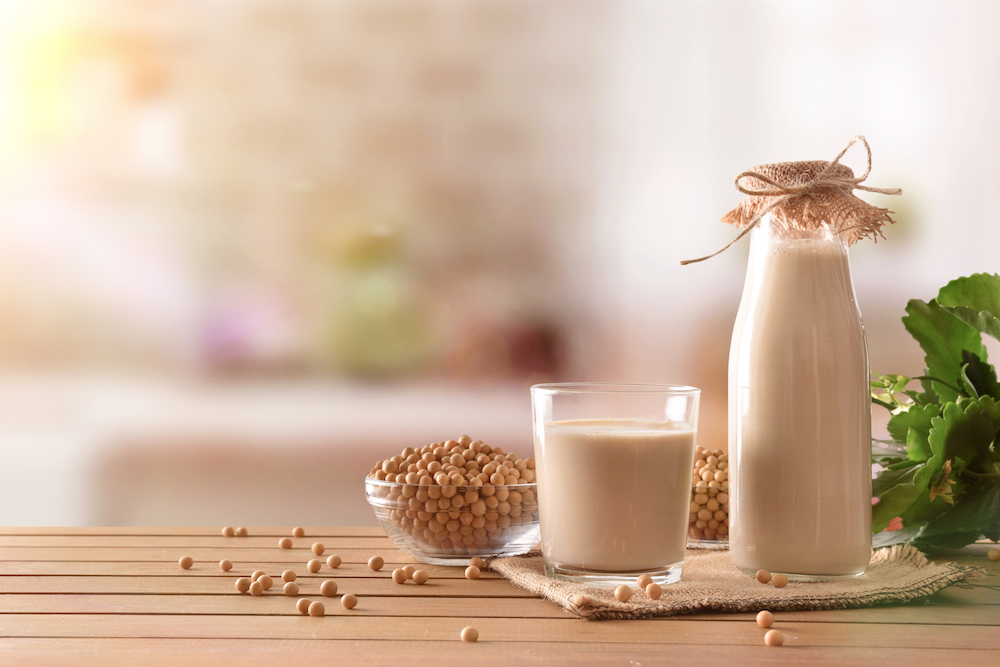
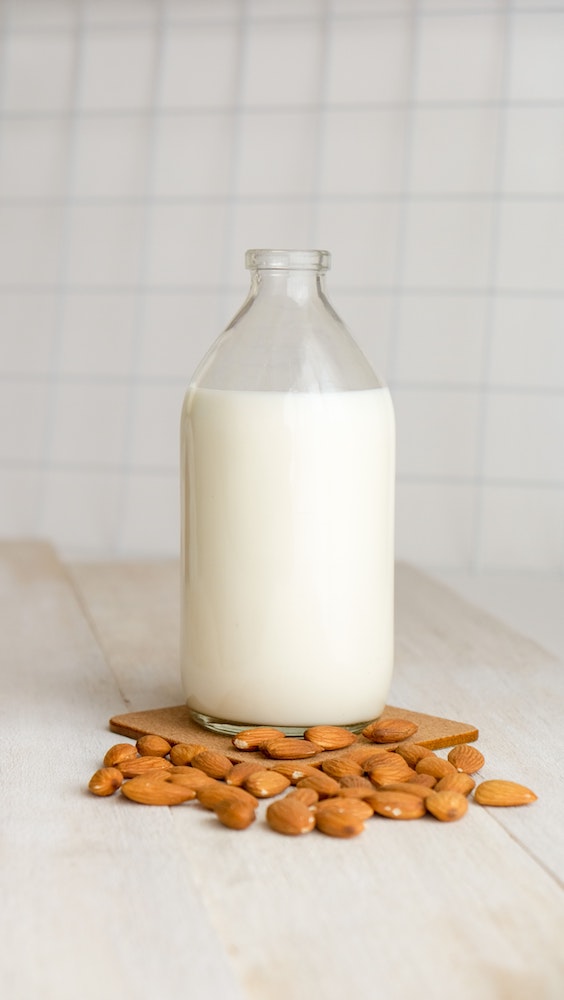
Plant Milk

A milk wash is great because chances are, you’ll always have plant milk in the house.

As well, as long as you’re using an unsweetened, unflavored variety of plant milk, it won’t add any extra flavor or sweetness to your baked goods.

Milk gives a deep golden brown color to your baked goods. Because you’re trying to emulate the browning effect of an egg’s protein, a plant-based milk that contains protein and fat (such as soy milk or nut milks) will work best.

Unfortunately, a milk wash doesn’t add an attractive shine like an egg wash does.

Milk works best for: Any baked good that you want to be golden brown, such as breads, pies, and pastries – sweet or savory!

Downsides: A milk wash will give your baked goods a nice golden brown color, but it unfortunately will not give them a lovely shine. 

Plant Milk + Liquid Sweetener (such as agave or maple syrup)

A combination of milk and sweetener gives you the best of both worlds of the two options I’ve just talked about. While the milk will help brown your baked goods, the sweetener will help give a caramelized sheen to the finished product.

To make this wash, a good general ratio is one part milk to one part syrup. Stir them together in a bowl, and it’s ready to use.

As a bonus, the milk dilutes the sugars in the syrup enough that you’ll be able to brush the wash on before your baked goods go in the oven; there’s not as much risk of the sugars burning.

Milk + sweetener works best for: sweet baked goods, such as fruit pies and pastry. Anything you want to have a golden brown, shiny finish.

Downsides: Again, since there’s sugar in this wash, it doesn’t go with savory baked goods.
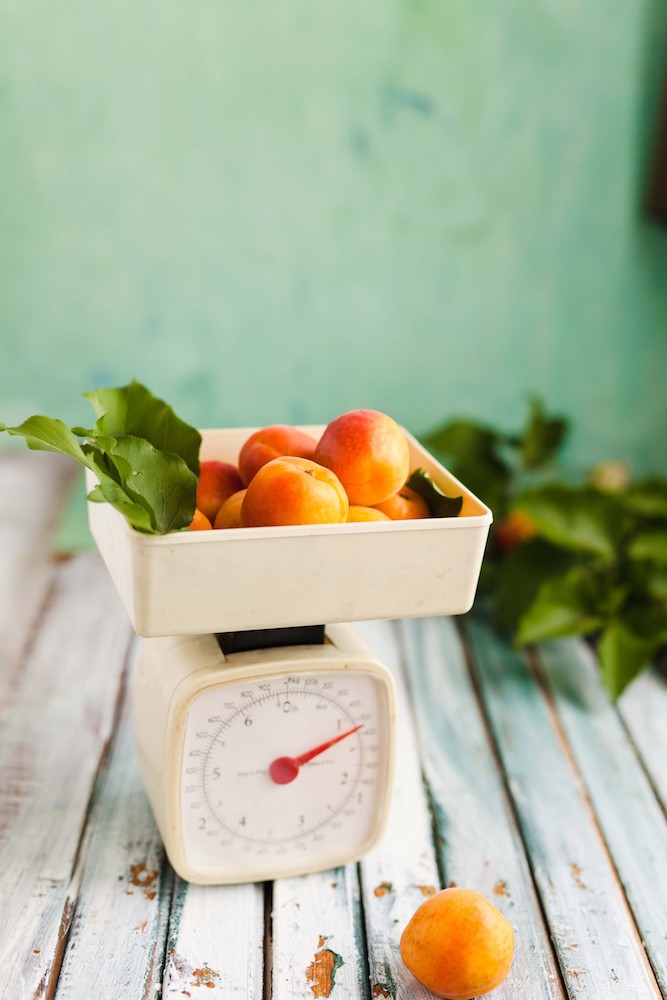
Apricot Glaze

Jar of apricot preserves

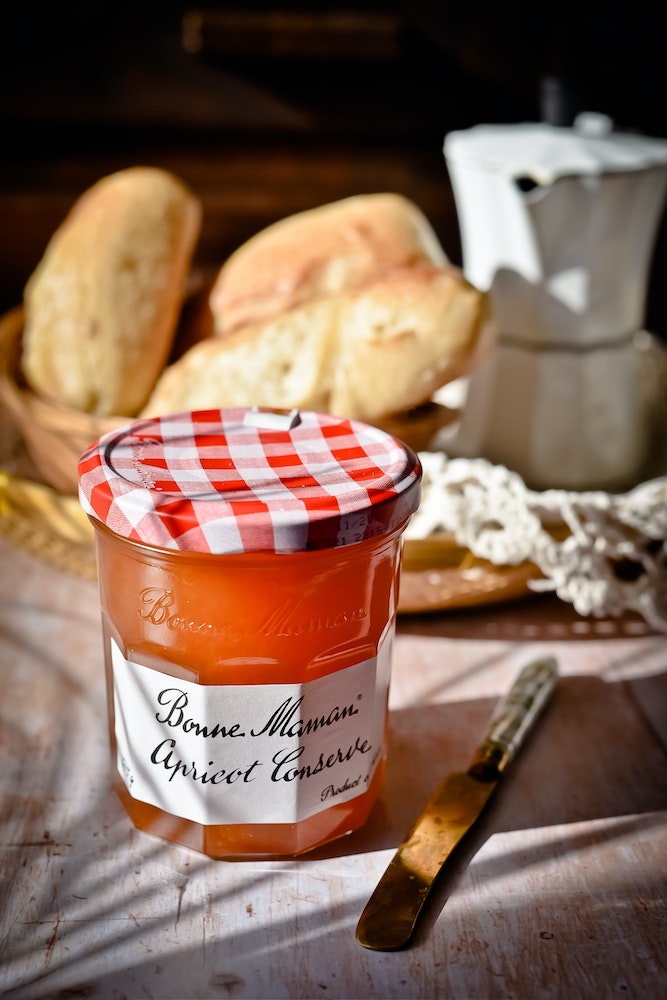
A glaze isn’t the exact same thing as an egg wash, but it will still give you an attractive color and shine.

An apricot glaze is a great solution for sweet pastry. It’s naturally sweet but doesn’t have a strong fruit flavor or color. It can also act as a protective coating for your pastry, helping it retain moisture as it bakes.

Plus, an apricot glaze is super easy to make.

Simply combine 125 grams (or ½ cup) of apricot preserves with 1 tablespoon of water in a saucepan. Cook on medium heat, stirring until the preserves become liquid. Turn off the heat and let cool until slightly warm, and then brush on a light coating of glaze onto your baked goods before baking them.

Apricot glaze works best for: pastries, danishes and croissants, pies, and other sweet baked goods. Would work especially well for desserts with fruit in them. Also good for pastry that you want to retain some moisture while it bakes.

Downsides: only really works for sweet baked goods. As well, a glaze is not functionally the same thing as an egg wash.

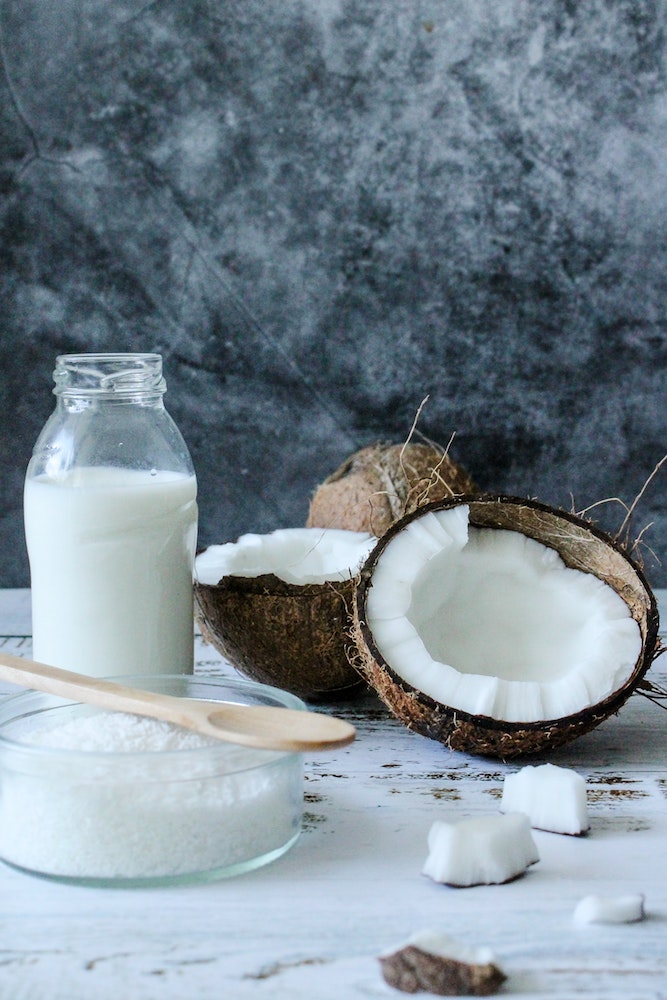
Oils, such as olive oil or coconut oil

Oil doesn’t carry much of a taste, making this a good choice for both sweet and savory bakes. As well, you always have oil around the house, making this a practical choice for finishing off your baked goods.

Olive oil is frequently used with bread. But other oils, such as coconut oil, would also work to brown your baked goods and give them a bit of a sheen.

One cool way to impart extra flavor into your savory bakes is to buy infused oils. They’re a bit of a splurge, but by using them, you can add extra garlic, rosemary, or other flavors to your bread!

Oil works best for: Breads or other baked goods where you want a soft texture and don’t mind oily fingers. For instance, focaccia is brushed with olive oil, giving its distinct texture.

Downsides: Adding extra oil will give you the color and shine that you want, but it definitely makes your baked goods oily. This may be unpleasant or take away from the texture, depending on what it is you’re making.

Vegan Butter

There’s a ton of brands of vegan butters these days. Chances are, you can find at least one variety at your local supermarket.

Vegan butter works well as a wash if you want to add color and extra rich, buttery flavor. I like to use it when making soft breadsticks. Because it’s not sweet, butter can be an option for washing both sweet and savory bakes.

However, the huge variety out there means that it can be hard to find the perfect one for you and your kitchen’s needs. Some butters are definitely oilier than others, and I’ve found that some taste better than others. You need to experiment to find out what works best for your bakes.

Butter works best for: Soft bakes such as breadsticks, soft rolls, or anything that you may want to add extra buttery flavor to. Like oil, butter softens bread, so don’t use it for anything you’d like to have a crispy crust.

Downsides: Like oil, butter can make your baked goods have a greasy outer texture. This is unwanted for baked goods like puff pastry, where you want a flaky or crunchy texture.

I also recognize that vegan butter is expensive compared to some of the other options on this list, and it can be hard to find depending on where you live. It may not be the most convenient option for you.

Conclusion

There’s lots of alternatives out there to egg wash, proving that you don’t need eggs to make satisfying or attractive baked goods.

What vegan washes or glazes have you used to finish off your baked goods? What’s worked best for you?

Filed Under: Baking 101, Blog, Science Tagged With: baking, baking 101, baking science, egg wash, eggs, vegan baking, veganizing

Kitchen Tools 101: Kitchen Scales

March 15, 2021

Scale with chocolate on it

Sometimes, it’s the cheapest purchases we make that change our lives. For me, it was my $15 kitchen scale.

This might be old news to you if you live somewhere where home bakers use kitchen scales regularly. But in good ol’ ‘Merican baking, kitchen scales aren’t really a thing. I grew up baking with cups and teaspoons, and so did everyone else I know. 

But a few years ago, inspired by my love of The Great British Bakeoff, I started getting really into baking bread. I wanted to bake some of the recipes that they were making on the show, so I looked them up online. Conveniently, the BBC’s website gives you directions for some of the recipes you see on the show!

…But all of the recipes used grams to measure the ingredients, not cups.

This was unfamiliar and confusing to me at the time. I didn’t have a scale, so the first few recipes I made were challenging and took twice as long as they should have, since I had to convert all of my ingredients to grams.

But why should this matter? Why is using a kitchen scale different than measuring cups? Is it easier to use a scale than cups?

Let’s look into it!

Volume versus weight

First off, you should know that scales and measuring cups are measuring two totally different things, which is why it was a little tricky for me to convert those BBC recipes. There’s no easy one-for-one conversion here.

Cups, tablespoons, and teaspoons measure by volume. That means you’re adding ingredients based off of how much of an ingredient can fit inside your measuring cup. 

The thing is, the amount of an ingredient you get into your cup can change depending on how you scoop. For example, scooping flour directly from the bag can compact the flour into your measuring cup, giving you way too much! It can be hard to keep things perfectly consistent.

A scale, on the other hand, measures weight. 100 grams of flour is always going to be the same amount, no matter how you choose to scoop it. That means that a scale is more consistent and accurate.

This is especially important when it comes to baking. You’ve probably heard that “baking is an exact science,” right? Well, a scale can help your measurements be more exact!

Kitchen scales make for speedier baking

Not only is measuring by weight more accurate, it’s also faster.

You don’t have to fuss around with multiple measuring cups. You can just spoon, sift, or pour directly into your mixing bowl and watch the numbers go up. As soon as it hits the correct number, you’re done!

As well, you don’t have to worry about how you’re filling up your measuring cup, or whether you’re compacting too much of an ingredient into your cup.

It’s simple, foolproof, and speedy! Your bread will never be too floury or stodgy again! (Except that it probably will, because bread-making is part witchcraft.)

Which scale should I buy?

Okay, so enough about the merits of scales. Clearly they’re awesome when it comes to quick and accurate baking. But which one should you buy?

When looking at scales, you should consider a few things.

1. Weight capacity

First, you should make sure that your scale can handle the weight you want it to. Many scales out there seem to be able to handle a maximum weight of 5 kg (or 11 pounds). This is more than enough for an average home cook. But if you’re frequently cooking with large batches of ingredients, there are scales out there that can handle a bit more weight.

2. Digital versus analog

You’ll also want to consider if you want a digital scale or an analog scale.

Digital scales are awesome because they’re easy to read. Most also have a setting to switch around to a variety of different weight options (such as grams, ounces, and pounds).

Analog scales work with springs. They’re more visually aesthetic to leave out on the counter. They are also great if you want a durable option that will never run out of batteries or switch itself off.

However, you can’t change the units on the scale like you can with digital, and most analog scales only use two or three different units (usually, grams and ounces/pounds).

3. Price

You should also think about price. Scales on Amazon range from around $10 to $50. 

If you’re a novice baker who bakes a few times a week or month, I’d probably go for an entry-level scale (scales that are around $20 or less). I purchased a very basic $12 scale, and it’s worked well for me for a year now. It’s small and not fancy, but it gets the job done just fine. (It’s also a good way to test out if you like working with a kitchen scale!)

Add on a few dollars, and you can get features like a larger measuring surface, a sleeker design, or a light-up LED display.

But if you’re a daily baker or someone who bakes large batches of food, I might recommend a hardier scale. A better-built, larger scale will fit in better with your kitchen and will last you longer.

How do I use a scale?

Okay, so you’ve made up your mind and purchased your scale. You’re about to use it for the first time, but you’re a bit confused. I understand. It can feel a bit intimidating at first, but I promise that it’s super simple!

Here’s a step-by-step guide to show you how I use my digital scale.

First, turn it on!

turning on your scale

Use the unit button to switch to the correct measurement.

Using the unit button

Place your mixing bowl (or other container) on top of the scale.

Placing the mixing bowl on the scale

The scale will weigh the bowl’s weight, which you don’t want. Press the ‘tare’ or zero button to set the scale back to zero, which subtracts the weight of the bowl and starts you off fresh.

Pressing the tare button

Add your first ingredient. Feel free to scoop, sift, or even pour from the original container! Keep an eye on the number on your screen, and stop adding your ingredient when you reach the number you want.

Scooping flour into the bowl

As before, press the ‘tare’ button to reset your scale back to zero. Repeat this process until you’ve measured all of your ingredients out.

Pressing the tare button

As you can see, it’s super simple, and even easier than working with measuring cups. You’re sure to get the hang of it in no time!

What should I do if my recipe uses cups instead of weight?!

Okay, let’s pause here. This post isn’t meant to say that you should throw out your measuring cups, or that you should never use cups again.

And honestly, even though I now prefer using recipes that go by weight, I still use my measuring cups if that’s what a recipe uses. It’s not as convenient, and it might take a bit longer, but you’ll still end up with tasty baked goods at the end of it.

However, if you do want to convert a recipe from volume to weight (or vice versa), there are several ways to do so.

As I mentioned before, there is no straightforward way to covert a recipe by just looking at it, as each ingredient has a different weight per given volume. For instance, a cup of flour weighs 125 grams, while a cup of sugar weighs 200 grams.

One solution here is to type each individual ingredient into Google to find the conversion. However, this is a lot of extra effort, especially for recipes that have a lot of ingredients. As well, it might be tricky to find conversions for more obscure ingredients.

Another solution is to have a paper copy of the recipe on hand. Make the recipe with cups, as the recipe is written, but put your measuring bowl on your scale. Write down the weight of each ingredient as you add it (making sure to hit the ‘tare’ button in between each measurement). By the end, you’ll have a successfully converted recipe!

The obvious downside to this second method is that you’ll need to make the recipe once by volume before you’re able to make it by weight. For that reason, this technique works best if you want to convert a favorite recipe that you know you’ll make over and over again.

What about measuring small amounts of ingredients?

I do have one exception to my stance on “weight is easier than volume.”

When you need very small amounts of ingredients like baking soda, salt, or vanilla, I’d recommend just sticking with measuring spoons. Kitchen scales can measure very light weights amounts, yes, but something like a quarter teaspoon of salt may struggle to register on your scale.

For that reason, I find it easier to measure very small amounts in teaspoons or tablespoons.

Conclusion

Kitchen scales are a wonderful addition to any baker’s kitchen, and I’d highly recommend you invest in one if you haven’t already!

Do you use a kitchen scale? What has been your experience? Let me know!

Filed Under: Baking 101, Baking Tools, Blog Tagged With: baking, baking 101, baking tools, kitchen scale, measuring

How To Veganize Recipes: A Guide

March 4, 2021

Person reading cookbook

If there is one thing I hate, it’s the implication that all vegan food is tasteless, healthy-tasting, and made solely of kale and flax seeds.

It’s not! There are loads of incredible plant-based recipes out there, especially within the past few years. There are tons of vegan cooking and baking blogs with recipes that taste amazing.

It’s also possible to “veganize” old, familiar favorites that you’ve enjoyed in the past – that is, to take a recipe that uses dairy, eggs, or meat and make it with plant-based ingredients instead.

It’s perfectly normal to crave old favorites, and eating vegan shouldn’t feel restrictive. Food is important to all of us, and some foods might remind you of good times. Unfortunately, some of the foods you’ve loved in the past are full of those animal products that you’re not eating anymore.

So if you want to satisfy your craving and still stick to your plant-based values, then you’ll have to figure out how to veganize that recipe.

It seems like it should be simple enough, right? After all, you can buy vegan butter, egg replacement, and soy milk at the supermarket, can’t you? Yup, and these work great.

But once you start baking, you’ll realize that some recipes definitely veganize better than others.

So what are you to do? How do you know if a recipe is good to veganize? Here are some tips.

Read through a recipe’s ingredient list

It’s important to read through a recipe first so you can get a good idea of how many ingredients you’ll need to switch out. It’s easy to swap out butter and a couple of eggs in a cookie recipe. The final product will taste pretty similar to the original recipe.

So let’s try it! As an example, let’s veganize a recipe so I can show you how easy it is.

Let’s use the recipe on the back of every Nestlé Toll House chocolate chip bag: a familiar recipe for lots of us.

2 ¼ cups all-purpose flour

1 teaspoon baking soda

1 teaspoon salt

1 cup butter, softened

¾ cup granulated sugar

¾ cup packed brown sugar

1 teaspoon vanilla extract

2 large eggs

2 cups chocolate chips

1 cup chopped nuts

recipe from https://www.allrecipes.com/recipe/174864/original-nestle-toll-house-chocolate-chip-cookies/

First, identify the ingredients that aren’t vegan. The only non-vegan ingredients here are the butter, the eggs, and possibly the chocolate chips.

Next, think of substitutes for these ingredients. Do this by considering the functions of the ingredient you’re replacing, and what would make for a good replacement. Or if you want a foolproof way to substitute, use a resource like my butter guide and egg guide to tell you what might work best for your recipe. 

It may seem a bit complicated at first. But after you’ve been baking for a while, knowing how to replace ingredients will become second nature!

Replacing the butter

Butter is the fat in the cookie that makes it tender and gives it richness and structure. The dairy butter can be replaced one-for-one with a vegan butter, which you can find in most supermarkets these days. It can also be replaced one-for-one with coconut oil. Coconut oil works well because it’s solid at room temperature and can be softened – just like butter!

Replacing the eggs

The eggs in this recipe can also be replaced in several different ways. It can be helpful to understand the differences between egg alternatives and which product works best in which recipe. Again, this may seem confusing and complicated at first, but it gets easier with practice.

In a cookie like this, I would either use ground flax seeds (if I didn’t care about there being flax bits throughout the cookie), or egg replacement powder (if I did care about flax bits). Both of these options will help bind the cookie dough together, without adding much extra texture, flavor, or moisture.

Replacing the chocolate chips

You might not have to replace this ingredient! Many chocolate chip brands are incidentally vegan, but some do contain milk. Check to be sure, if you want to avoid all animal products.

Baking the cookies with your new ingredients

For a simple recipe like this, just use the softened coconut oil in place of the butter. It will cream together with the sugar in a similar way to butter.

As well, use the flax seeds or egg replacement powder when the recipe tells you to put in eggs. (Just be sure to mix it with water a few minutes ahead of time so that it can properly gel up before you add it in.)

Other than that, bake the cookies exactly as the package says.

Congrats! You’ve just successfully veganized a recipe.

When does veganizing a recipe not work?

Stack of three macarons
Macarons: notoriously difficult to make, both vegan and non-vegan

Sadly, this doesn’t always work out so smoothly.

When looking at a potential recipe, you should also consider how heavily a recipe relies on animal products. The more animal products a recipe uses, the more difficult it is to veganize the recipe and still maintain the original taste and texture.

This is especially true if a recipe uses a lot of eggs. 

Eggs are a tricky ingredient. In my experience, they’re the hardest thing to successfully replace in a recipe.

My own general rule is that one or two eggs are easy to replace in most recipes (check out my egg replacement guide here!).

But when you get into recipes that use three, four, five eggs, it’s difficult to achieve the exact results of the initial recipe without losing texture and flavor. That recipe is relying a lot on the eggs.

Recipes with a lot of eggs can be successfully veganized, of course. But you may need to do some experimenting to get the result you want, and you might not be successful on the first try.

Additionally, you should note that recipes that use just egg yolks or just egg whites (such as meringues, custards, and macarons) hold additional challenges. Yolks and whites have their own unique properties, and these recipes are relying heavily on them to give the final product structure and texture.

So unlike chocolate chip cookies, it’s nearly impossible to just replace the eggs in a macaron with something else.

Let’s look at an example!

Take this ingredient list for a simple custard (the original recipe can be found here).

4 cups whole milk   

1 tablespoon vanilla extract   

1 teaspoon butter   

4 eggs   

½ cup white sugar   

3 tablespoons cornstarch

recipe from https://www.allrecipes.com/recipe/258755/simple-custard/

Four cups of whole milk is a lot, but that could be replaced with soy milk or coconut milk. And one tablespoon of butter is simple enough to replace.

But four eggs?

In this recipe, the eggs are really working to provide taste, texture, and thickness. And ground flax seeds, egg replacement powder, aquafaba, or applesauce (some of my usual ways of replacing eggs in bread and cookies) would definitely not cut it here.

So in this case, I would recommend specifically searching out a vegan custard recipe. Most of the recipes I have seen out there use coconut milk or coconut cream, plus extra cornstarch to get the proper thickness. Some even add a touch of turmeric to mimic the yellow color of egg yolks!

These recipes will taste delicious and will take into account the missing eggs by substituting for them in a way that works.

Which brings me to my next point…

Use specifically vegan recipes

If you want to veganize your grandmother’s carrot cake recipe because it’s sentimental to you, I fully understand. Or if you find a recipe in a magazine that looks super amazing, but it’s not vegan, that shouldn’t stop you from trying it.

With the magic of substitutions, you can eat many of the foods that you enjoyed before eating plant-based!

But there is a whole world of delicious vegan food made by and for vegans that tastes absolutely amazing.

These people really understand how to use plant-based ingredients to their advantage, rather than just substituting plant butter and soy cheese for dairy butter and cheese and calling it good.

For that reason, I would recommend checking out two of my favorite plant-based foodie bloggers, Minimalist Baker and Oh She Glows for some easy-to-follow, super delicious recipes.

There’s really something to be said for following the wisdom of someone who’s been baking vegan for years and who knows the tips and tricks to making delicious plant-based food. Good vegan bakers and cooks are seriously innovative, and you can learn a lot from them.

Happy baking!

Filed Under: Baking 101, Blog, Science Tagged With: butter, egg replacement, milk, recipes, vegan baking, veganizing

Ingredients 101: Non-Dairy Milk

February 26, 2021

Soy milk in jar and glass

It’s not just hippie vegans who use plant-based milk anymore!

People with allergies, health-conscious individuals, environmentally-conscious people, or people who just don’t like the taste of cow milk all consume dairy alternatives. (Of course, us hippie vegans also still use it!)

In the United States alone, people purchased two billion dollars of milk alternatives in 2019! Additionally, the sales of dairy milk are falling. The market grew 61 percent from 2012 to 2017, making up 13 percent of the milk market in 2017. And each year, new types of milk being released onto the market.

While most people still buy dairy milk, plant-based alternatives are very popular.

So what is the difference between all the different kinds of plant-based milk out there? What’s the best for baking? What’s the best-tasting one? Let’s find out!

Is it really milk? 

Okay. A note before we start, to get it out of the way. A lot of companies don’t actually refer to these products as “milk,” but rather, names like “organic soy beverage.” The reason being, there have been disputes about whether vegan products can legally be called milk.

However, I will be referring to these products as milk throughout this blog post, as this is frankly a stupid argument. I have never called it “organic soy beverage,” except to be sarcastic.

And while these products don’t literally come from the udder of an animal, nor do they have the exact same nutritional content, they can be used anywhere you use dairy milk: with cereal, to bake desserts, to make soup creamy, to dip your cookies in.

That’s milk to me.

So how is it made?

Big manufacturers make plant-based milk by using many machines. It’s rather complicated to explain the whole process succinctly, so please enjoy this very satisfying “How It’s Made” video (and be entertained by how many times the narrator says “beverage”).

While it’s a lot easier to buy milk from the store, you can also make your own plant milk from scratch! (Here are some easy recipes to make soy milk and almond milk.)

Basically, you need to blend the main ingredient (i.e. almonds, oats, soybeans, etc.) with water in a high speed blender. After blending until creamy and smooth, strain the mixture through a cheesecloth or nut milk bag. Some ingredients like soybeans aren’t safe to eat if they haven’t been cooked, so you may also need to cook it on the stovetop.

One plus side to making your own milk is that you can control what goes into it. If you have serious allergies and can’t handle cross-contamination, this is a good option. You can also flavor your milk to your own liking, adding in ingredients like dates, vanilla, salt, or cocoa powder to give extra flavor.

But one downside to making it yourself is that it only stays good for three or four days. Manufactured plant milk is homogenized and contains preservatives so that it’s shelf-stable and stays good for a longer time (up to a year).

It’s also just easier to go to the store and buy a few boxes to have on hand. I don’t make my own milk out of laziness, but it’s definitely an option if you have the extra time or you’re really trying to avoid food additives.

What Varieties Are Out There?

As a kid, I remember being a big fan of chocolate soy milk. It had a kinda funky flavor compared to chocolate cow milk, but I liked it well enough and would have a box with lunch.

Back then, soy milk was the biggest plant-based option on the market. But over this past decade, plant-based milk varieties have exploded into the marketplace.

As well as soy, you can now find plant-based milks made from almonds, cashews, oats, rice, coconut, hemp, hazelnuts, pecans, and many others. And while having all of these options is amazing – especially for people with allergies to soy and nuts – it can also be overwhelming. 

Which milks taste the best? Which ones work the best for baking? What type should I choose?!

Let’s find out!

Soy Milk

Soy milk has been around for a long time, but there’s a good reason for that. It has the most similar texture to cow’s milk, as well as the most natural protein of all of the non-dairy milk varieties. 

Protein is important in giving baked goods (especially cakes and breads) a good texture and structure. It also helps baked goods brown. 

Therefore, it’s one of the best plant-based milks when it comes to baking.

However, soy milk does have a distinctive taste that not everyone likes, and that may turn you off of it.

There is also some question about whether soy is bad for your health. That’s an issue that’s too complex to get into in this humble blog post, but it’s definitely something that you should do your own research on to see if soy products are right for you!

If you do decide to go with soy milk, I would advise that you stick with organic soy milk to avoid potential issues with pesticides (GMO soy is known to carry more pesticide residue than organic).

Nut Milks (Almond, Cashew, Pecan, Hazelnut, Walnut, etc.)

Almond milk in jar

Almond milk is the most popular non-dairy milk out there today, with 61% of sales. It’s got a very mild flavor that doesn’t stand out from cooking or baking. It also has a nice consistency that takes well to baking. It gives good structure to baked goods, and I’d recommend it as an overall good option.

Other nut milks have come onto the market in recent years. While their overall flavor and nutritional profiles vary a little, nut milks tend to be naturally sweet and have a nutty flavor. This works well for sweet baked goods.

One downside to nut milks is their environmental footprint. Almonds especially are a water-heavy crop compared to a lot of the other plant milks on this list. 

However, keep in mind that it takes a hell of a lot more water and land in order to raise cows for milk and meat. So it’s overall a more environmental choice to drink almond milk and limit your animal product consumption, than to eat the Standard American Diet.

Coconut Milk

Coconut milk

Coconut milk is generally found in cans (although boxed and powdered versions do exist and may be more common where you live). 

Unlike other varieties of non-dairy milk, coconut milk is very different. Generally, it is thick, creamy, and deliciously coconutty. If you open it before shaking it up, you’ll find that it separates into a heavy cream at the top, and a watery liquid at the bottom.

It also comes in full-fat and light varieties. I personally prefer the full-fat version. It’s creamier and makes for richer desserts and meals.

While canned coconut milk is too rich and thick to substitute for regular milk, it is your best choice for a heavy cream substitute. It can be whipped up just like heavy dairy cream. It’s great for desserts, as well as soups and curries.

One thing to note: there’s also a refrigerated, boxed version that I’ll call “coconut beverage.” It’s a watered down version of coconut milk and more similar in texture to other plant-based milks. However, it usually has a bunch of additives and sweeteners, if you’re looking to avoid that sort of thing.

If your recipe calls for coconut milk, don’t use coconut beverage! It won’t provide the fat content and flavor that you need. Coconut beverage is also not a great choice for baking because of its high water content. However, if you want a nice, coconutty milk to put in your coffee, it’s a good choice.

Oat Milk

Oat milk gained a lot of traction in 2019 when coffee shops started using it. That’s for good reason; oat milk blends into hot liquid a lot better than many other plant-based milks (other types of milk, like almond, will even separate in hot liquid, which isn’t very palatable). It gives hot coffee and tea a good, creamy taste.

Oat milk has also been praised for being environmentally friendly. Oats don’t need a lot of space or water to grow, so compared to most other milks, oat milk has a small footprint.

When it comes to baking, it works okay. Soy and almond milk seem to work more consistently, and oat milk can struggle to produce proper texture in quick breads. Full-fat oat milk tends to work the best in baking.

Pea Milk and Hemp Milk

Pea milk and hemp milk are both new on the scene. 

Both of these options have high protein contents, similar to soy milk, making them a good choice for baking and cooking. And if you’re worried about potential health issues associated with soy, these options may interest you.

However, they both have distinct flavors, and you may need to sample them before deciding that they’re the right choice for you.

Rice Milk

Rice milk has a very high water content, with almost no fat or protein. It’s also among the sweetest milks.

On the plus side, rice milk is great for people with a lot of allergies. It also seems to work well for making drinks.

However, it’s not good for baking. It’s thin and unreliable to bake with, and you may need to experiment with adding extra thickening agents in with your recipes should you really want to use it.

Flavored or Non-Flavored?

A lot of non-dairy milks come in flavored and non-flavored varieties.

Generally, “flavored” equals vanilla. (Many brands also have a chocolate variety, though that’s obviously more of a drinkable choice than something you’d cook with.) If you’re primarily baking sweet things, a little extra vanilla flavoring isn’t a bad thing! Vanilla milk also tastes good with cereal.

Some flavored varieties are also sweetened.

For baking, sweetened milk isn’t that big of a deal and won’t stand out with other sugar in the mix. I would still recommend non-sweetened so that you can better control the amount of sugar that goes into your baked goods. (I also personally tend to avoid sweetened drinks to avoid excess sugar intake.)

So where does flavored milk not work? Savory baking. Vanilla flavoring definitely stands out in a bad way. Whether it’s the crust for vegetable pie, batter for breading eggplant parm, or adding creaminess to your favorite soup, having a touch of vanilla can be funky.

Unflavored milk is an all-around good option if you want to avoid any trace of vanilla flavor in your baked goods and cooking. 

So what milk should I choose? 

What’s the final conclusion? Which milk is best?

Well… I can’t give you a definitive “best” choice, unfortunately. Sorry!

For my own personal kitchen, I would go with soy milk or almond milk, as they have a nutritional profile that works well for baking. They also tend to be less expensive than other types of milk.

But the thing is, everyone has different priorities when it comes to choosing a favorite product. Some people prioritize flavor, others environmental impact, while others have allergies to contend with. Certain types of milk (especially new entries onto the market) can be quite pricy, so you may choose based on your wallet.

Ultimately, the best milk for your household is the one that you think tastes and works the best. 

I would recommend sampling a few and experimenting with them in your baking and cooking. What works best for your needs and palette?

Filed Under: Baking 101, Blog, Ingredients, Science Tagged With: baking 101, baking science, ingredients 101, milk

How To Convert Baking Soda To Baking Powder In A Recipe

February 18, 2021

cookies on pink background

You’re in the middle of baking your favorite cookie recipe when you realize… you’ve run out of baking soda. Oh no! What are you to do?

Can you use that baking powder in your cabinet instead?

Yes, you can!

Not only do baking soda and baking powder have similar names, they also have similar functions. They both leaven (or rise) your baked goods.

However, there are a few differences between the two products, so you need to understand how they’re different before you substitute (doing a 1-for-1 substitute won’t work here, sorry!).

What is the difference between baking soda and baking powder?

Baking soda leavens baked goods when it’s combined with an acid (like lemon juice, vinegar, or cream of tartar). Just like your grade school volcano, this combination of ingredients reactions by bubbling up, creating carbon dioxide air bubbles and giving your breads and cookies a great texture.

You don’t need to add an acid to get baking powder to work – it already contains one! Baking powder is a combination of baking soda and a weak acid, plus a binding starch to stabilize the product to stop it from reacting before you use it. That means that this shelf-stable product will only react when you introduce liquid and heat to it.

Things to keep in mind before substituting

Person stirring bowl of cookie dough

While they’re related products with the same function, baking soda and powder do have their differences. So here’s some things you will need to keep in mind before substituting one for the other.

  1. Baking powder is basically just baking soda plus an acid. That means that if your original recipe uses baking powder, you will need to also add an acid if you’re substituting with baking soda. It won’t work on its own.
     
  2. Baking powder is made up of other ingredients besides baking soda. So by volume, it contains less of the raising agent (baking soda) you need to rise your baked goods. That means that you’ll need more baking powder to accomplish the same level of rise.
  3. You may find that your recipe has a slightly different taste if you use a different leavening agent. You probably won’t notice it if you’re making a strong chocolatey cake, but if you’re making a delicately flavored vanilla cookie, you might be able to taste the difference. However, if you’re strapped for time or have just run out of powder or soda, these conversions will do in a pinch. They should give you a similar texture and rise to the original recipe.

So now that you have all of these things in mind, how do you convert these two ingredients? Is there an easy way? Luckily, yes! There’s some easy formulas you can use to convert!

Converting Baking Soda to Baking Powder

If your recipe uses baking soda but you only have baking powder, to substitute, a general rule is:

1 teaspoon of baking powder = 1/4 teaspoon of baking soda 

Converting Baking Powder to Baking Soda

If your recipe uses baking powder, it might not have an acid in it to activate your substituted baking soda. So if you’ve run out of baking powder, you can use soda. Just remember that baking soda is a lot more potent, since it’s undiluted!

To substitute, you can use baking soda plus cream of tartar:

1/2 teaspoon cream of tartar + 1/4 teaspoon baking soda = 1 teaspoon baking powder

If you don’t have cream of tartar, you can also use another acid in place of it. Lemon juice and white vinegar are the most common kitchen acids. However, please remember that these two acids have a much stronger taste than cream of tartar! Their taste will come through in more delicate-flavored baked goods.

If you do choose to use lemon juice or vinegar as your acid, here’s a simple conversion:

1 teaspoon of lemon juice (or white vinegar) + 1/4 teaspoon of baking soda = 1 teaspoon of baking powder

Conclusion

Substituting baking soda and baking powder is simple, as long as you understand the basic science behind it. I hope this post cleared up some of the mysteries between these two similar ingredients.

Happy baking (and converting)!

Filed Under: Baking 101, Blog, Ingredients, Science Tagged With: baking, baking 101, baking powder, baking science, baking soda, ingredients 101, leavening

Next Page »

Primary Sidebar

Recent Posts

  • Baking 101: Vegan Egg Wash
  • Kitchen Tools 101: Kitchen Scales
  • How To Veganize Recipes: A Guide
  • Ingredients 101: Non-Dairy Milk
  • How To Convert Baking Soda To Baking Powder In A Recipe

More Cool Stuff!

7 Reasons Why Baking Failures Are Actually Helpful

bread

Baking 101: Vegan Egg Wash

Baking 101: High Altitude Vegan Baking

Vegan Pumpkin Spice Sugar Cookies

  • Instagram
  • Pinterest

Copyright © 2025 The Brownie Quest on the Brunch Pro Theme